
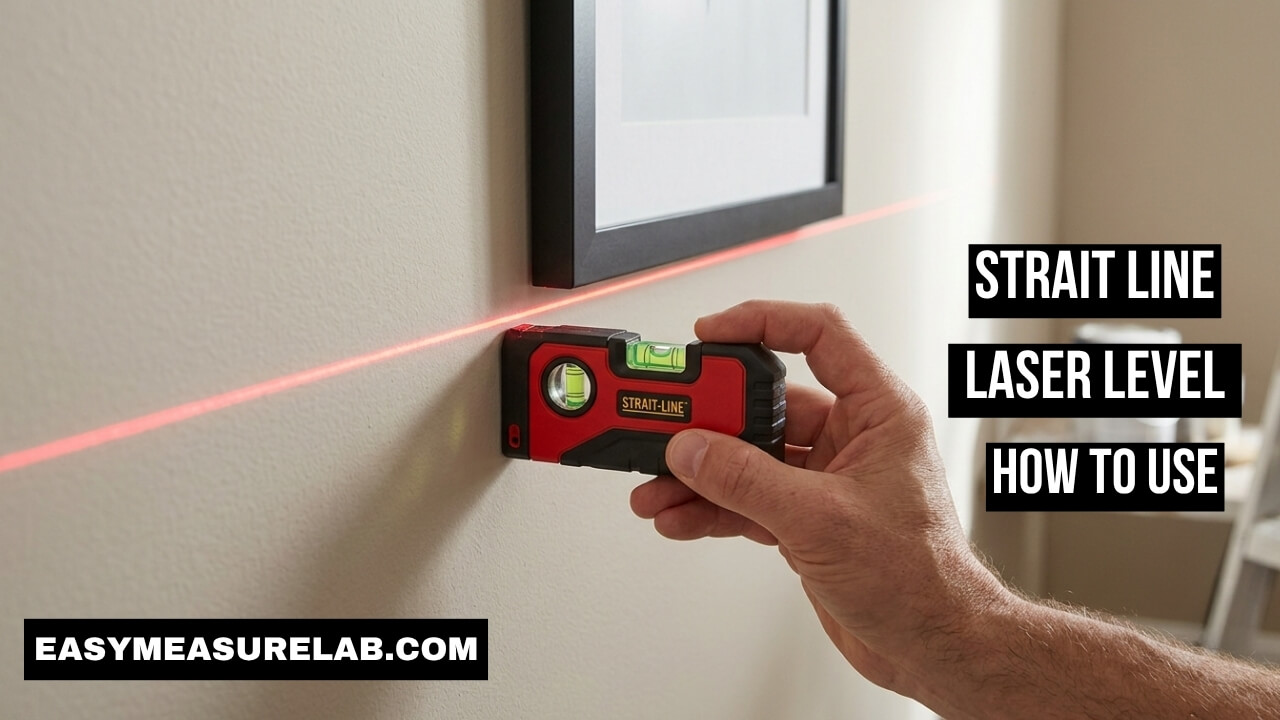
I still remember the day I bought my first laser tool. I stood in my living room with a bunch of picture frames. I had no idea what to do next. I grabbed my phone and searched for “strait line laser level how to use” because the box instructions were terrible.
I made a lot of mistakes that first day. I put holes in my wall. I drained the batteries fast. But I kept testing it. Over time, I learned the best ways to set it up. This tool is actually great once you know its quirks. Today, I want to share exactly what I learned. I will show you how to use it without the frustration.
Getting to Know Your Tool First
You need to know the parts of your tool. This makes the job much easier. I ignored the parts at first. That was a big mistake.
The tool looks very simple. It is basically a plastic box. It has a laser lens on one side. It has two small bubble levels on the front. It also has a way to stick to the wall.
The Wall Mounting System
The mounting system confused me the most. Most models use two small metal pins. You push these pins into the wall. This holds the tool in place.
Some older models use suction cups. Some use a special putty. But the push pins are the most common. They work well on drywall. They do leave tiny holes, though. I will share a trick for that later.
| Mounting Type | Best Surface | Biggest Flaw |
| Push Pins | Drywall, Wood | Leaves tiny holes in the wall |
| Suction Cup | Glass, Tile | Drops off easily |
| Sticky Putty | Painted Walls | Can peel off old paint |
The Bubble Vials
There are two small liquid bubbles on the face of the tool. You must use these. They are the secret to straight lines.
One bubble is for horizontal lines. The other bubble is for vertical lines. When the bubble is right in the middle of the black lines, your tool is perfectly level.
Strait Line Laser Level How To Use: The 7 Amazing Steps
Learning the strait line laser level how to use process takes just five minutes. I promise it is very simple. I do this exact 7-step routine every time now.
First, make sure you have fresh batteries. The laser fades very fast when the batteries run low. You will barely see the red line.
Step 1: Prep Your Wall and Tool
Do not just grab the tool and start pushing it into the wall. First, wipe the wall with a dry cloth. Dust makes the tool slip. Next, check the back of your laser level. Make sure the pins are fully extended and straight. If you are working in a very bright room, close the curtains slightly so the laser will be easy to see.
Step 2: Mark Your Starting Point
You need a solid starting point. Do not just guess where the line should go. I use a pencil for this part.
Make a tiny pencil mark on the wall. This is where you want your line to start. Measure up from the floor if you need a specific height. I usually use a standard tape measure for this step. For more on proper measuring, I often check out guides on Family Handyman.
Step 3: Mount the Tool to the Wall
Hold the tool against the wall. Line up the top edge with your pencil mark. Now, press it flat.
Push the tool firmly against the drywall. You will feel the two small pins slide into the wall. The tool should now hold itself up. Let go slowly to be sure. If it feels loose, push a bit harder.
| Wall Type | Pin Grip Strength | My Advice |
| Standard Drywall | Very Strong | Push firmly until flush |
| Wood Paneling | Medium | Might need a gentle tap |
| Plaster Walls | Weak | Pins might bend, be careful |
Step 4: Level the Bubble Vials
Do not turn the laser on yet. Look at the small liquid bubble on the front. It will probably be off to one side.
Gently pivot the tool. Turn it slightly up or down. Keep your eye on the bubble. Stop moving when the bubble rests perfectly between the two dark lines.
Step 5: Power On the Laser Beam
Now you are ready for the magic. Press the power button. A bright red line will shoot across your wall.
Since you leveled the bubble, this red line is perfectly straight. It will follow the wall for several feet. You can now use this line as your guide.
Step 6: Mark Along the Laser Path
Once the laser is on, do not bump the tool. Use a pencil to make small, faint marks along the red beam. If you are painting, this is the time to apply your painter’s tape directly under the red light. The line gives you a perfect edge to follow without needing a long ruler.
Step 7: Safely Remove and Store
When you are done, turn the power off immediately to save the battery. Grip the tool firmly and pull it straight out from the wall to avoid making the pinholes bigger. Retract the pins if your model allows it, and store the tool in a safe place where the lens will not get scratched.
My Favorite Trick: The Command Strip Hack
I hate putting pinholes in my walls. Sometimes I want to hang things in an apartment. Pinholes can cost you your security deposit. I had to find a better way.
I learned a great trick. You can use 3M Command Strips instead of the pins. It changed how I use this tool completely.
Prepping the Tool
First, you need to retract the pins. Most Strait-Line models let you push the pins back inside the casing. Make the back of the tool completely flat.
If your pins do not retract, you might need a different trick. But most of them do. Clean the flat back of the tool with rubbing alcohol. Let it dry completely.
Applying the Strips
Take a small Command Strip. Stick it to the back of the tool. Press it down hard.
Now, stick the tool to your wall. You can still pivot it slightly to get the bubble level. When you are done, pull the strip tab to remove it. No holes! You can read more about safe wall hanging tips on Bob Vila.
| Mounting Method | Wall Damage? | Reusable? |
| Built-in Pins | Yes (Tiny holes) | Yes (Endless uses) |
| Command Strips | No (Clean removal) | No (Need new strips) |
| Masking Tape Loop | No | Yes (But weak hold) |
Real Projects I Tackled
I did not just buy this tool for fun. I had real chores to do. The strait line laser level how to use steps finally made sense when I started working.
Here are the projects that proved how valuable this little tool really is.
Hanging a Gallery Wall
My wife wanted a gallery wall. This means hanging ten different picture frames in a neat grid. Doing this with a standard ruler is a nightmare.
I stuck the laser level to the wall. I found the perfect center line. The red beam stayed on the wall while I hammered my nails. Every single frame lined up perfectly. It took me half the time it normally takes.
Painting Clean Stripes
I wanted to paint a racing stripe in my son’s room. Painter’s tape can be tricky to get perfectly straight. The laser saved the day.
I shot the red line across the room. Then, I simply placed my blue painter’s tape right along the laser beam. I did not have to draw long pencil lines on the fresh paint. For expert painting advice, I always trust This Old House.
| Project Type | Laser Usefulness | Time Saved |
| Picture Frames | Extremely High | Hours |
| Painting Stripes | Very High | 45 Minutes |
| Putting up Shelves | High | 30 Minutes |
Dealing With Annoying Problems
No tool is perfect. I got frustrated a few times. The tool would act up. The line would vanish.
I learned how to fix these issues. Most of the time, the fix is very simple. You just have to know what to look for.
The Red Line is Too Faint
This happened to me on a sunny Saturday. I turned the tool on. I could barely see the line on the wall. I thought it was broken.
Sunlight washes out red lasers. It is just a fact. I learned to close the blinds. Dim the lights in the room. The red line will pop right back into view. Also, check your batteries. Weak batteries make a weak beam.
The Tool Keeps Slipping
Sometimes the tool will slowly slide down the wall. This ruins your straight line. It usually happens on dirty walls.
Dust acts like powder. It stops the pins or the suction cup from grabbing. Wipe the wall with a dry cloth first. If you use the pins, make sure they go all the way into the drywall.
| Problem | Likely Cause | Quick Fix |
| Faint Laser | Too much room light | Close curtains, dim lights |
| Blinking Laser | Low battery power | Swap out for fresh AAs |
| Sliding Tool | Dust on the wall | Wipe wall with a dry cloth |
Advanced Tips I Learned Later
After a few months, I felt like a pro. I stopped looking up strait line laser level how to use videos. I started finding my own ways to work faster.
These are small habits. But they make a huge difference. They save time and keep your walls looking nice.
Using Tape as a Target
Sometimes the laser line fades near the end of a long wall. It gets hard to see exactly where it hits the corner.
I take a small piece of blue painter’s tape. I stick it at the far end of the wall. The red laser beam shows up much brighter on the dark blue tape than on a white wall. It is a great visual target.
Working Around Corners
The tool only shoots a line straight ahead. But what if you need to wrap a line around a room corner?
Shoot the line to the corner. Make a pencil mark exactly where the laser hits the adjacent wall. Now, move the tool to the new wall. Pin it exactly on that new mark. Level the bubble. Shoot the line again. It is a perfect wrap-around.
Maintaining Your Laser Level
I want my tools to last. If you throw this in a messy toolbox, it will break. The lens is fragile.
I take good care of my laser level now. It still works like it is brand new. Here is what I do to keep it safe.
Clean the Lens Often
The laser shoots through a tiny plastic window. If this window gets dusty, the line gets fuzzy. The line will look thick and blurry on the wall.
I use a soft microfiber cloth. I gently wipe the clear plastic window before every project. Never use harsh chemicals. A dry cloth is all you need. You can find safe cleaning supplies at places like Home Depot.
| Part to Clean | Tool to Use | What to Avoid |
| Laser Window | Microfiber Cloth | Paper towels (they scratch) |
| Tool Body | Damp Rag | Chemical sprays |
| Battery Box | Dry Q-tip | Water or damp rags |
Take the Batteries Out
I left the batteries in my tool for six months. I did not use it once. When I finally grabbed it, it was dead.
Worse, the batteries had leaked. There was white crust inside the battery door. I had to scrape it out carefully. Now, I always take the batteries out when I finish a project. It takes two seconds and saves the tool.
Final Thoughts
Learning the strait line laser level how to use steps changed how I handle house projects. I no longer dread hanging pictures or putting up shelves. The fear of crooked frames is totally gone. This simple little tool does exactly what it promises, as long as you take the time to follow the 7 steps and set it up right.
Just remember to level the bubbles before you trust the red line. Try the Command Strip trick if you hate wall damage. Keep the room slightly dim, and your lines will be crisp and bright. It is a small investment that will save you hours of frustration.
5 SEO-Friendly FAQs
How do you mount a Strait-Line laser level without damaging walls?
Retract the metal push pins on the back of the tool. Use a removable 3M Command Strip instead. Stick the strip to the back of the level and press it to the wall. It holds firm and leaves zero holes.
Why is my laser level line so hard to see?
Bright sunlight or strong room lights wash out red laser beams. Close your blinds or dim the lights to make the beam visible. Also, replace the batteries, as weak power causes a faint line.
Can I use a Strait-Line laser level for vertical lines?
Yes. You can rotate the tool vertically. Look at the second bubble vial on the tool. Adjust the tool until that second bubble is perfectly centered. It will now shoot a straight vertical line.
Does a Strait-Line laser level work on brick walls?
The built-in push pins will not penetrate brick or concrete. You must use a heavy-duty double-sided mounting tape. Alternatively, rest the tool on a stable tripod or a nearby flat surface.
How accurate is a standard laser level for home use?
For standard room distances (up to 20 feet), they are incredibly accurate. They are much more reliable than trying to eyeball a straight line or using a short hand ruler. Just ensure the bubble is perfectly centered.