
I love the charm of my old house. But hanging heavy things is very frustrating. I learned this the hard way. I tried to hang a heavy vintage mirror in my living room. I bought a cheap plastic sensor from the local hardware store. It beeped everywhere I put it. I drilled a hole anyway and hit nothing but dust. The mirror fell, my wall cracked, and it was a massive mess.
You might be dealing with the exact same headache right now. Knowing how to find a stud in a plaster wall is hard because normal tools just do not work. Old walls are thick and hide thin wood strips inside. But I figured out how to beat the system. I will share the seven exact tricks that actually work. You will save time, save your walls, and hang your items securely.
Why Standard Tools Fail on Old Walls
Normal tools hate old houses. They use density sensors to find wood. The problem is that old walls are totally full of wood.
| Wall Type | Main Material | Tool Works? |
| Modern Drywall | Thin gypsum board | Yes, very well |
| Old Plaster | Thick mix over wood strips | No, too much noise |
| Solid Masonry | Solid brick or block | No, fully solid |
Builders long ago nailed thin wood strips across the main supports. These thin strips are called lath. Then, they smeared wet mix over the lath. The whole wall feels solid to a modern sensor.
The Density Problem
The digital sensor reads the lath strips as one giant piece of wood. The tool beeps without stopping. You get false readings everywhere. I ruined a perfectly good drill bit testing these fake spots.
Trick 1: The Rare Earth Magnet Method
This is my absolute favorite trick. It works almost every single time. You do not need batteries or expensive gear. You just need a very strong magnet.
| Tool | Cost | Success Rate |
| Rare Earth Magnet | Under $10 | Very High |
| Standard Sensor | $20 – $50 | Very Low |
| Deep Scan Tool | $60 – $100 | Medium |
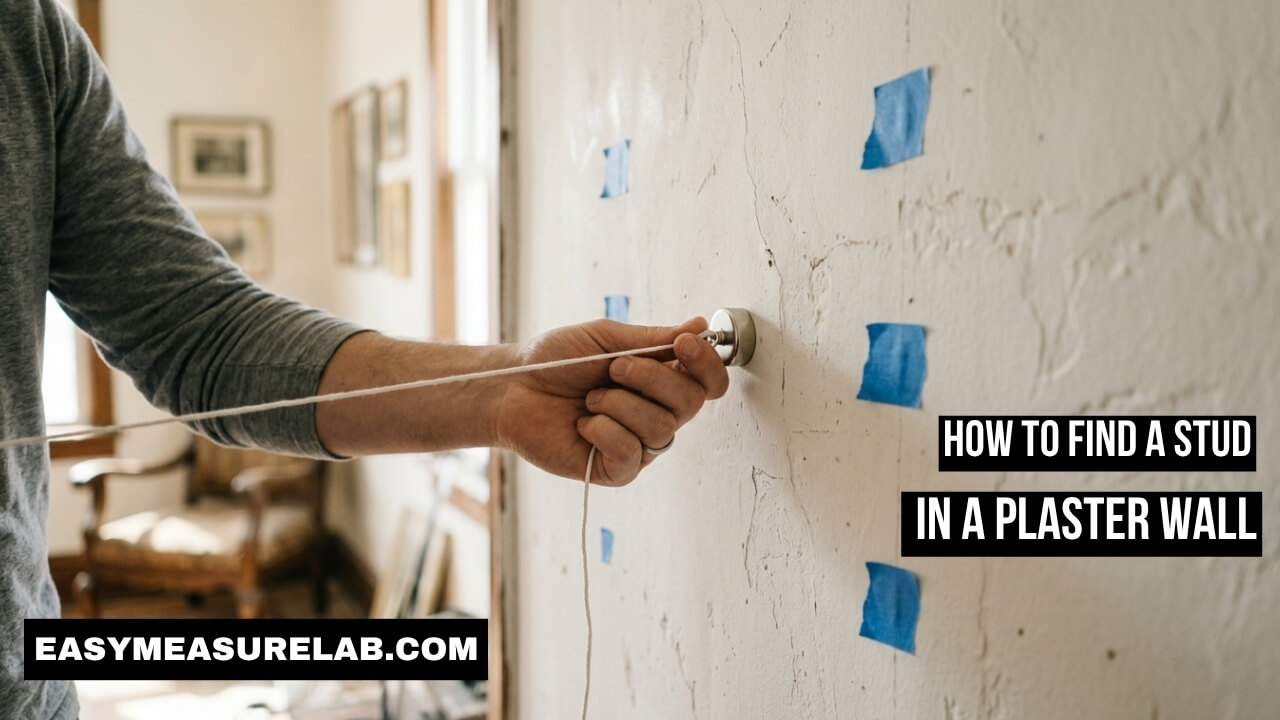
Buy a neodymium magnet. You can find them at any local craft or hardware store. Tie a piece of thin string to it. Run it slowly across the wall surface.
Finding the Hidden Nails
The magnet does not look for wood. It looks for metal. Builders used small iron nails to attach the lath to the heavy wood supports. The magnet will stick firmly to these hidden nails.
When the magnet pulls, mark the spot with painter’s tape. Move straight up or down. Find another pull. If they line up perfectly, you found the hidden wood.
Trick 2: Check Near Your Electrical Outlets
Electrical boxes are your best friends in an old house. Builders had to attach these metal boxes to something strong and solid.
Take off the plastic cover plate. Look inside the wall box. Shine a bright flashlight in there. You will easily see which side has the thick wood block.
The 16-Inch Rule
Most vertical supports sit 16 inches apart. Find the wood on one side of the outlet. Measure 16 inches to the left or right. You should find the next one there. This rule helped me hang my heavy TV bracket safely. You can read more about wall framing basics from experts at This Old House.
Trick 3: Using a Small Metal Detector Wand
Sometimes a magnet is hard to hold against a bumpy wall. A small metal detector wand works great too. Security guards use these wands. You can buy one cheaply online.
It works just like the magnet trick. It finds the tiny lath nails hidden deep in the wall.
| Issue | Common Cause | Quick Fix |
| Wand beeps everywhere | Iron pipes in wall | Turn down power |
| Wand finds nothing | Wire lath used | Try a different wall |
| Wand beeps in lines | Finding old wires | Move up or down |
Sweep the wand slowly across the wall. Listen for the sharp beep. Mark the spot. Move up a few inches and sweep again. You want to map a straight vertical line. This proves it is a wall support, not a wandering pipe.
Trick 4: Find Clues in Baseboards and Trim
Look very closely at your floor trim. Carpenters nailed the heavy baseboards straight into the wall supports. This keeps the tall trim tight against the wall.
Look for tiny dimples in the wood trim. Painters fill these holes, but you can usually spot them. These dimples hide the nail heads. Sometimes the nails are clearly visible.
Mapping the Wall
Find a filled nail hole in the baseboard. Get a level or a string with a weight. Draw an invisible line straight up the wall. That line is usually your safe target area.
Trick 5: Measuring From the Corners
Corners are the strongest parts of your room. Builders always put massive wood posts in every corner of the house. You can use this fact to your advantage.
Measure exactly 16 inches out from the corner. Mark the spot. Measure another 16 inches. Mark it again. Old houses are rarely perfect, but this gives you a great starting point. Combine this with the magnet trick for the best results. The folks at Fine Homebuilding always suggest starting at the corners.
Trick 6: The Coat Hanger and Test Hole Method
Sometimes you just have to drill. I try to avoid this. But sometimes the wall is too thick for magnets to work properly.
| Mistake | Better Approach |
| Drilling a huge hole | Use a tiny 1/16-inch bit |
| Guessing the depth | Mark the bit with tape |
| Leaving holes open | Patch with light spackle |
Use the smallest drill bit you own. Pick a spot where you think the wood lives. Drill straight in.
The Coat Hanger Probe
If you miss, stop right away. Do not make the hole bigger. Take a piece of stiff wire or a cut coat hanger. Bend it into an L-shape. Poke it into the hole. Spin it around inside the wall. You can often feel the solid wood hiding a few inches away. Then drill your real hole there.
Trick 7: Rent a Radar Wall Scanner
If all else fails, you can use high-tech gear. Normal sensors use density. But advanced radar scanners look inside the wall like an X-ray.
These tools are very expensive. But you can rent them from big hardware stores for a few hours. They connect to your phone. They show you exactly where the pipes, wires, and wood live. If you have a massive project, this rental is worth the money.
Common Mistakes When Learning How to Find a Stud in a Plaster Wall
People rush the job. I rushed it once and caused a huge chunk of wall to fall out. The mix is very old and brittle. You have to be gentle.
Do not use heavy wall anchors if you miss the wood. Toggle bolts work for light items. But heavy things need real wood support. Family Handyman has great guides on weight limits for different anchors.
| Myth | Reality |
| Old walls cannot hold weight | They can, if you hit wood |
| Any wall scanner works | Only magnetic ones work well |
| Lath is strong enough | Lath breaks under heavy weight |
Another big mistake is ignoring pipes. Old houses have weird plumbing layouts. Never drill deep. Wrap bright tape around your drill bit. Only drill deep enough to pierce the wall crust. Check out Bob Vila for more safety tips on old home walls.
Final Thoughts
Finding hidden wood takes patience. Do not trust cheap digital sensors in old houses. They will just make you angry and leave your walls full of holes. Grab a strong magnet instead.
Look at your baseboards. Check your outlets. Use a tiny drill bit if you must. Take your time and test your spots twice. You will learn the hidden secrets of your walls. Your mirrors and TVs will stay up safely. Good luck with your next home project!
Frequently Asked Questions
Can I use a normal stud finder on an old plaster wall?
No, they usually do not work. The wood lath strips confuse the density sensor. It will beep everywhere and give you false spots.
What is the best magnet to use for this job?
Use a neodymium rare earth magnet. They are very strong. They can pull through thick walls to find the hidden lath nails.
How far apart are studs in old houses?
They are usually 16 inches apart from the center. But old houses can be weird. Sometimes they are 24 inches apart. Always test your spots to be sure.
Is it safe to drill directly into old walls?
Yes, but go very slow. Old walls are brittle and can crack easily. Use a sharp bit. Do not push too hard. Watch out for old wires and pipes.
What if I want to hang something light without hitting wood?
You might not need a solid wood support. You can use a toggle bolt. The bolt wings grab the wood lath behind the wall. This works very well for light picture frames.