
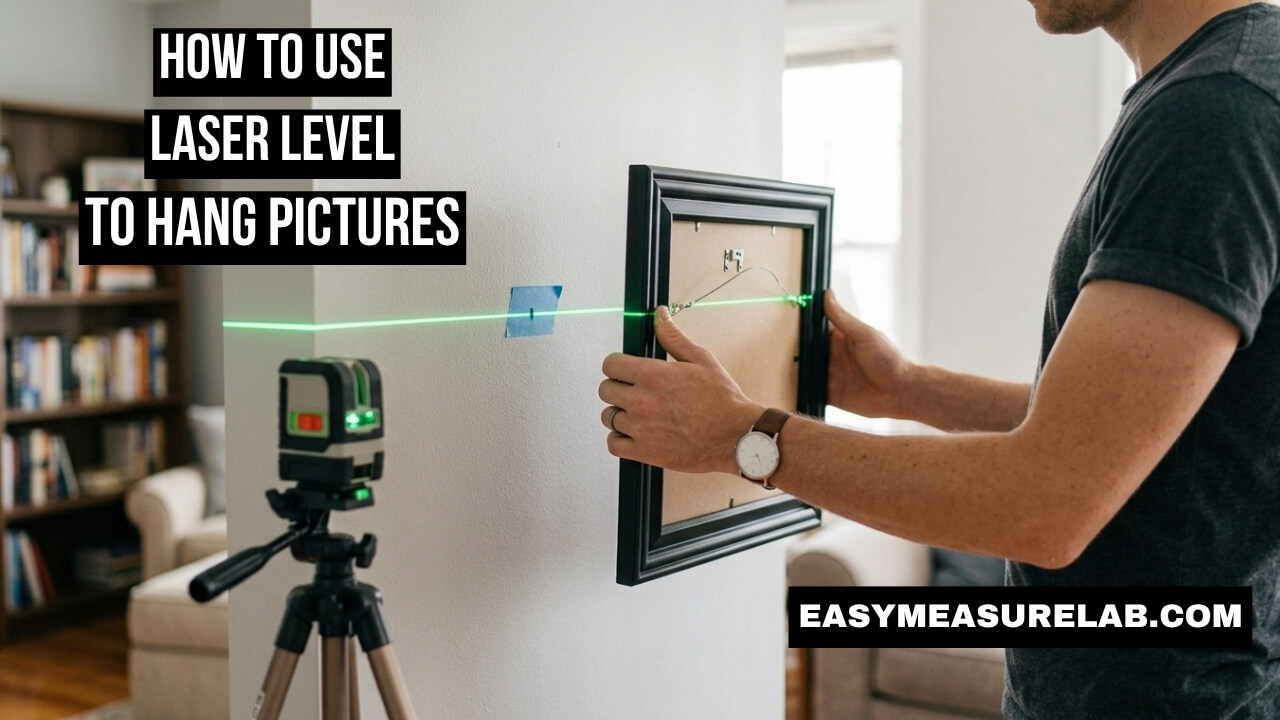
I used to hate hanging wall art. My walls looked like Swiss cheese. I would guess the spot. I would drill a hole. I would hang the frame. It was always crooked. I felt so frustrated.
Then I learned how to use laser level to hang pictures. It changed everything. Now, I hang gallery walls in minutes. I leave no extra holes. I feel no stress. You can do it too. I will show you my exact method.
Why I Ditched the Old Bubble Level
I love basic tools. But bubble levels fail for big frames. You must hold the level. You must hold the frame. You must hold a pencil. You need three hands to do it right. I always drop things when I try this.
A laser level frees up your hands. It sits on a tripod. It casts a bright red line across the whole room. You can step back. You can see exactly how the art will look. It makes the job so much faster.
What You Need Before You Start
You do not need fancy tools. Just a basic setup. I keep these things in a small box. It makes art day very easy.
You probably have most of these in your garage right now. Grab them before you start.
| Tool | Why You Need It |
| Crosshair Laser Level | Casts straight lines on the wall. |
| Camera Tripod | Holds the laser steady at any height. |
| Painter’s Tape | Protects the wall and marks the spot. |
How to Use Laser Level to Hang Pictures (My Step-by-Step Method)
Let us get to the fun part. Here is how to use laser level to hang pictures perfectly every time. I do this in my living room. I do this in my bedroom. It always works.
Step 1: Prep Your Wall and Gear
Clear the floor space. You need room to step back. Set up your laser on a tripod. Turn it on.
If you do not have a tripod, do not worry. You can stack some sturdy boxes. Just make sure the box sits flat.
Step 2: Find Your Ideal Height
Most art galleries hang frames at eye level. That is usually 57 inches from the floor. Measure 57 inches up your wall.
Make a small mark with a pencil. This is where the center of your art should sit. This keeps everything looking neat.
Step 3: Lock the Laser Line
Turn on the crosshair laser. Let it self-level. Wait for the blinking to stop. The horizontal line shows your perfect level.
Aim this horizontal line at your pencil mark. The vertical line helps you line up frames side by side.
Step 4: Measure the Frame Drop
This is where I used to mess up. You cannot just drill on the laser line. You must measure the frame drop.
Flip your art over. Pull the hanging wire tight toward the top edge. Measure the distance from the wire to the top of the frame.
Step 5: Mark the Spot and Drill
Put a piece of painter’s tape on the wall. Mark your exact spot on the tape. The tape keeps your wall clean.
It also stops the drill bit from slipping. Drill your hole right through the tape. Insert your wall anchor. Put in the screw. Hang your art.
Step 6: Step Back and Verify
Before you pull the trigger on your drill, take a pause. Step back across the room. Look at the laser line and the marked tape on the wall.
Does the placement look right? Sometimes a room’s layout tricks your eyes. It is much easier to move a piece of tape right now than to patch a drywall hole later.
Step 7: Hang the Art and Clean Up
Put your screw into the anchor. Leave just enough of the screw head sticking out. Hang your picture frame securely on the screw.
Slide the frame gently until it perfectly aligns with your laser line. Finally, peel off the painter’s tape. Your wall is clean, and your art is perfectly straight.
Hanging Different Types of Picture Hardware
Not all frames hang the same way. The back of the frame changes how you measure. Here is how I tackle the most common types.
Dealing with a Picture Wire
Wires stretch over time. Always pull the wire tight before you measure. Measure the gap.
Subtract that gap from your top laser line. This ensures your frame does not sag too low.
Managing Two D-Rings
D-rings are tough. They do not stretch. They must be perfectly level. A laser makes this easy.
Shine the laser line on the wall. Measure the exact distance between the two rings. Mark two spots on the laser line. Drill both holes.
Simple Sawtooth Hangers
These are very easy. Find the exact middle of your frame. The sawtooth sits right on the nail.
Just put your laser line where you want the top of the frame. Measure down to the sawtooth. Drill your hole there.
| Hardware Type | My Best Tip |
| Picture Wire | Pull tight before measuring. |
| Dual D-Rings | Mark both spots on the laser line. |
| Sawtooth | Center the laser line exactly. |
Creating a Perfect Gallery Wall with a Laser
Gallery walls look great in a hallway. But they used to make me sweat. A laser level makes them so simple.
I start with the bottom row. I shine the horizontal line across the wall. I hang all the bottom frames first. They all line up perfectly.
Then I move the laser up. I do the next row. The vertical laser line helps too. It helps you keep the spaces between frames exact. Experts at This Old House suggest keeping a 2-inch gap between all frames. I follow this rule every time.
| Gallery Wall Mistake | How to Fix It |
| Uneven spacing | Use the vertical laser line to check gaps. |
| Crooked rows | Hang the bottom row first as a baseline. |
| Crowded frames | Leave exactly two inches between each frame. |
Dealing with Quirky Rooms and Uneven Floors
Old houses have slanted floors. My house was built in 1950. Nothing is straight. If you measure up from a slanted floor, your pictures will look weird.
Always trust the laser. A good laser has a self-leveling feature. It uses a pendulum inside. It uses pure gravity.
Gravity does not lie. Your floor might slope, but your art will hang straight. If you hang art above a sofa, do not use the floor. Center the laser above the sofa. Measure up from the back of the couch instead.
| Room Issue | Laser Setup Solution |
| Slanted floors | Rely on the self-leveling laser, not the floor. |
| Hanging over a sofa | Base your laser line on the top of the sofa. |
| Staircase walls | Lock the laser at an angle to match the stairs. |
Finding Wall Studs and Using Anchors
Heavy mirrors need strong support. Light frames are fine on plain drywall. I always check for studs first.
I use a magnetic stud finder. It finds the screws inside the wall. If my laser line crosses a stud, I am happy. I use a long wood screw.
If I miss the stud, I use a drywall anchor. Do not skip the anchor. Your art will fall. Glass will break. I learned that the hard way. According to The Family Handyman, a basic plastic anchor can hold 20 pounds. That is plenty for most art.
Buying the Right Laser Level for Home Use
You do not need a costly tool. A cheap crosshair laser works fine for home projects. I bought mine online for cheap.
Look for a self-leveling model. Green lasers are better than red ones. Green light is much brighter.
It is easier to see in sunny rooms. Bob Vila strongly recommends green lasers for bright indoor spaces. Make sure it has a tripod mount on the bottom.
| Laser Feature | Do You Need It? |
| Self-leveling | Yes. This is a must-have. |
| Green beam | Yes. It is much easier to see. |
| 360-degree line | No. Crosshair is fine for home use. |
The Biggest Mistakes I Made Early On
I messed up a lot when I first started. I rushed the job. I guessed the measurements. I want to save you that trouble.
Never guess the wire stretch. Always pull it tight. Never assume the ceiling is level. It never is. Only trust the laser line.
Take your time. Step back and look at the laser line before you drill. It takes ten seconds. It saves you ten minutes of patching holes.
| My Early Mistake | The Better Way |
| Trusting the ceiling | Let the laser level itself with gravity. |
| Guessing the wire drop | Always measure the wire pulled tight. |
| Drilling naked drywall | Put painter’s tape down first. |
Final Thoughts
Learning how to use laser level to hang pictures changed my home. I finally hung all the posters sitting in my closet. It feels great to see them on the wall every day.
Take your time. Measure twice. Trust the glowing line. Your walls will look like a real art gallery. You will never go back to the old bubble level again.
Frequently Asked Questions
Can I use a red laser level to hang pictures?
Yes. Red lasers work fine for most rooms. However, green lasers are brighter. They are easier to see if your room gets a lot of sunlight.
How do I hang pictures on a staircase with a laser?
Lock your laser line so it does not auto-level. Tilt the tripod to match the angle of your stairs. Hang your frames along that angled line.
Do I have to use a tripod?
No. You can set the laser on a table or a stack of books. But a camera tripod makes it much easier to change the height.
What is the best height to hang a picture?
Hang your art so the center is 57 to 60 inches from the floor. This is eye level for most people.
Why is my laser level line blinking?
A blinking line usually means the laser is not sitting flat. It cannot self-level. Adjust the tripod until the laser stops blinking.