
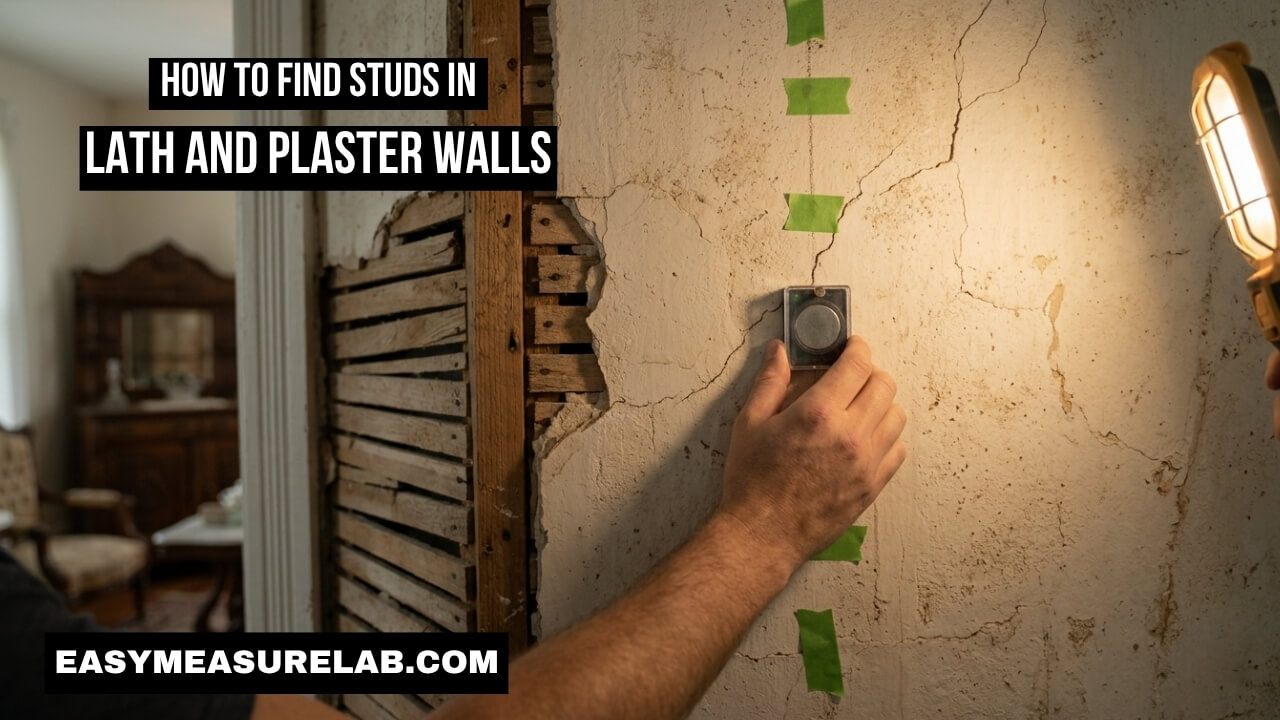
I live in an old house. I love the charm. I hate hanging things on the walls. For the longest time, figuring out how to find studs in lath and plaster walls drove me crazy. I ruined quite a bit of paint before I learned the right way to do it.
Standard stud finders beeped at everything. I tried tapping the wall, but it all sounded solid. I just wanted to hang a heavy mirror. After making too many holes, I finally learned the tricks that actually work. I want to share those real-world lessons with you today.
Why Normal Tools Fail on Vintage Walls
Old houses are built differently than new ones. You need to know why your tools are failing.
Modern homes use drywall. Drywall is thin. It is uniform. Standard electronic stud finders work well on it. They detect changes in wall density. But lath and plaster is a totally different beast.
Plaster is thick. It is spread over thin wooden strips. These strips are called lath. The lath is nailed to the studs. Because you have layers of wood and thick plaster, the density is completely random. Your electronic finder just gets confused. It beeps everywhere. It is useless here.
| Tool | Why It Fails | What Happens |
| Standard Electronic Finder | Reads density changes. | Beeps constantly or not at all. |
| The “Knock” Test | Plaster is too thick. | The whole wall sounds solid and hard. |
| Deep Scan Finders | Wood lath tricks the sensor. | Gives false positives on the lath strips. |
Trick 1: How to Find Studs in Lath and Plaster Walls Using Magnets
This is the trick that changed everything for me. It is simple, cheap, and very effective.
You do not look for the wood stud. You look for the metal nails. The lath strips are nailed into the wooden studs. If you find a vertical line of nails, you have found your stud.
Picking the Right Magnet
Not just any magnet will work. A fridge magnet is too weak.
You need a strong rare-earth magnet. Neodymium magnets are the best. You can buy them online or at a hardware store. I bought a magnetic stud finder specifically designed to find screws and nails. It is just a strong magnet in a plastic case. It works like magic.
The Sweeping Technique
Using the magnet takes a little patience. You cannot just rush it.
Hold the magnet loosely in your hand. Slowly sweep it across the wall in a wide “S” pattern. Go back and forth. Move up and down. Eventually, you will feel a slight pull. The magnet will stick to the wall.
| Magnet Type | Strength | My Recommendation |
| Fridge Magnet | Very weak | Do not use. It will not work. |
| Bar Magnet | Medium | Okay, but might miss deep nails. |
| Neodymium Magnet | Very strong | Best choice. Sticks firmly to hidden nails. |
Once the magnet sticks, mark the spot with a piece of painter’s tape. Do not use a pencil. Pencil is hard to wash off plaster. Now, move the magnet straight up or down from that spot. You should find another nail about an inch away. If you find a vertical row of tape marks, you found the center of your stud.
Trick 2: Using Outlets and Switches as Clues
Sometimes you do not need tools at all. You just need to look at the room.
Electrical boxes are almost always attached to a stud. This is true in old houses and new ones. You can use this fact to your advantage.
Find an outlet on the wall. The stud is usually right next to it. You can take off the plastic cover plate to look inside. Make sure you turn off the power first for safety. Look to see which side of the box is nailed to wood. That is your stud.
From there, you can measure outward. In most old houses, studs are spaced 16 inches apart. Sometimes they are 24 inches apart. Measure 16 inches from the outlet. Tape a magnet there. See if it sticks.
| Electrical Item | Stud Location | Measurement Rule |
| Wall Outlet | Left or right side | Measure 16 inches outward. |
| Light Switch | Left or right side | Measure 16 inches outward. |
| Wall Sconce | Often dead center | Measure 16 inches left or right. |
You can learn more about standard framing practices from Bob Vila. It helps to understand how builders worked back then.
Trick 3: The Metal Detector Trick
I tried this once when I was really stuck. It is overkill, but it works.
If your magnet is not strong enough, a handheld metal detector will do the job. Some specialized stud finders are basically just small metal detectors. They do not look for density. They look for the metal nails holding the lath.
Sweep the device across the wall. It will light up when it hits a nail. Mark the spots with tape. Look for the vertical line. The only downside is the cost. These tools are more expensive than a simple magnet. But if you have a lot of art to hang, it is worth the money.
Trick 4: Measuring From the Corners
Rooms start at the corners. Builders work outward from there.
Corners always have studs. They need strong wood to frame the room. You can use the corner as your starting point. Measure 16 inches from the corner. Make a small mark.
Then, measure another 16 inches. Keep doing this across the room. Old houses are not perfectly built. The spacing might be 15 inches or 17 inches in some spots. But this gives you a very good guess. Once you measure, use your magnet to confirm the exact spot.
| Starting Point | First Measurement | Second Measurement |
| Room Corner | 16 inches | 32 inches |
| Window Edge | 16 inches | 32 inches |
| Door Frame | 16 inches | 32 inches |
Trick 5: Looking for Ghost Lines and Cracks
Your wall might just tell you where the studs are. You just have to look closely.
Over time, dust settles on walls. Sometimes, it settles differently over the studs. This creates faint, dark vertical lines. These are called ghost lines. If you see a perfectly straight, faint line going down your wall, there is probably a stud behind it.
Cracks are another clue. Plaster is hard and brittle. Houses settle and shift over time. When the house moves, the plaster cracks. These cracks often follow the line of the lath joints. These joints usually break right over a stud.
If you see a vertical crack, test it with your magnet. You might get lucky. You can read more about plaster cracks and house settling at This Old House.
Trick 6: The Last Resort (Drilling Small Test Holes)
Sometimes the magnet tricks fail. Sometimes the plaster is just too thick.
When nothing else works, you have to drill. I hate making holes, but sometimes it is the only way. Do not drill a giant hole right away. Use a very tiny drill bit.
Drill into the wall where you think the stud is. If the bit hits lath, it will push through easily. Then it will hit empty space. If it hits a stud, you will feel solid resistance. The bit will keep pulling out wood shavings.
If you miss, do not panic. Take a piece of stiff wire. Bend it into an “L” shape. Push it through the hole. Spin it around. When the wire hits wood, you know which direction the stud is. Measure that distance, and drill your real hole.
| Issue | Solution | Benefit |
| Plaster is too thick. | Drill a 1/16-inch test hole. | Easy to patch with spackle. |
| Missed the stud. | Use the bent wire trick. | Finds the stud without making more holes. |
| Hit empty space. | Move left or right slightly. | Narrows down the target area. |
Common Mistakes When Learning How to Find Studs in Lath and Plaster Walls
I made a lot of mistakes when I first moved into my house. I want to save you the headache.
The biggest mistake is trusting standard tools. I bought a fancy $50 stud finder. I thought the price meant it would work. It did not. I ended up returning it. Trust the magnet instead.
Another mistake is rushing the process. You cannot find a stud in five seconds on these walls. You have to go slow. Sweep the magnet carefully. Map out the wall with tape. If you rush, you will drill into empty space.
Also, do not assume every house is built perfectly. The 16-inch rule is a guideline. It is not a law. My house was built in 1920. Some studs are 14 inches apart. Some are 18 inches apart. Always verify with a magnet before you drill your final hole.
You can find great tips on working with old framing from Family Handyman. They have helped me fix many DIY mistakes.
Final Thoughts
Living in an old house requires patience. You have to learn new ways to do simple tasks.
Figuring out how to find studs in lath and plaster walls used to stress me out. Now, it is just a routine. I grab my strong magnet, my painter’s tape, and I take my time. I rarely make a mistake anymore.
Do not let your walls intimidate you. Ditch the electronic tools. Use a rare-earth magnet. Look for the nails. Use your outlets as a map. Take it slow, and you will be hanging your heavy mirrors and shelves safely in no time.
5 Frequently Asked Questions
Can I use a regular stud finder on lath and plaster?
No. Regular stud finders read density changes. Because lath and plaster have varying densities, the tool will give false readings and beep randomly.
What is the best magnet to use for plaster walls?
You need a rare-earth neodymium magnet. They are incredibly strong and can detect the small nails buried deep under thick plaster.
How far apart are studs in old houses?
Most studs are spaced 16 inches apart on center. However, older homes were not always built to strict codes, so they could range anywhere from 14 to 24 inches apart.
Is it safe to drill into lath and plaster?
Yes, but you must go slowly. Use a sharp drill bit and do not push too hard. If you push too hard, you can crack the plaster and cause it to break off the lath.
Why do I keep hitting empty space when I drill?
You are likely hitting the wood lath strip, but missing the main vertical stud. Lath strips are thin and will not hold heavy weight. You must use a magnet to find the vertical row of nails to locate the true stud.