
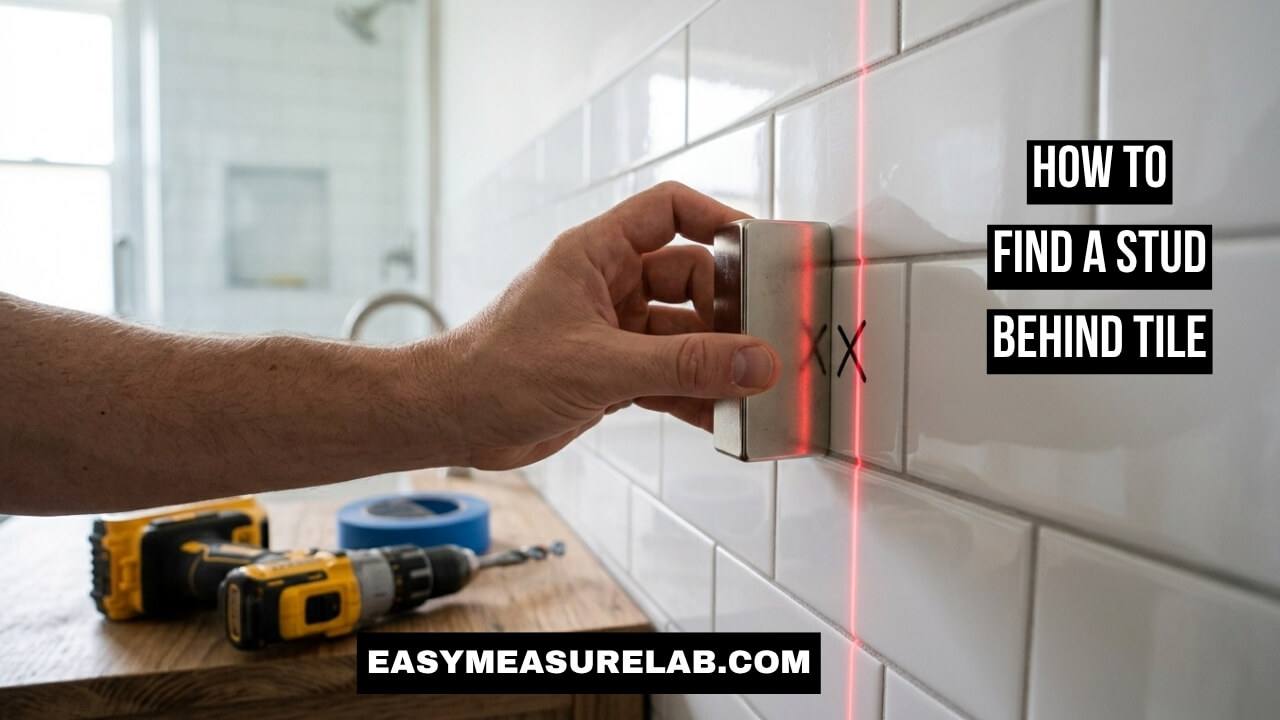
Do you have a tiled wall? You want to hang a big mirror. You need a safe spot. You must find the wood in the wall. This wood is called a stud. But tile is very thick. It is very hard. You feel stuck. I know this pain. I broke a nice wall once. I will show you how to find a stud behind tile today.
I learned the hard way. Normal tools fail here. They beep at the wrong time. I will share my best tips with you. You will learn to use a magnet. You will learn simple math tricks. You will feel safe. You will not crack your wall.
Why You Need to Know How to Find a Stud Behind Tile
Tile walls are very thick. They are not like normal walls. You must know the difference.
The Fear of Broken Walls
Normal walls use thin paper boards. You find the wood fast. Tile walls use hard stone. They use thick glue. They use thick cement boards.
This thick wall hides the wood. You feel lost. You guess the spot. You drill a hole. The wall cracks. You ruin the whole piece. I hate when that happens. It takes hours to fix.
Why Cheap Scanners Fail Here
You might own a basic wall sensor. This tool looks for thick spots. But tile is already thick. Cement board is thick too.
The cheap tool gets confused. It thinks the whole wall is wood. It flashes red all over. It beeps fast. I threw my cheap tool away. It did not help me.
| The Problem | Why It Happens |
| Tool beeps a lot | Tile stops cheap sensors |
| Wall sounds empty | Cement blocks the sound |
| Drill slips fast | Tile glaze is slick |
The Best Tools for the Job
You need the right gear for this. Do not use cheap tools. Use smart tools.
Strong Magnets Work Best
This is my best trick. You do not look for the wood. You look for metal screws. Builders use big screws. These screws go deep in the wood.
You need a rare earth magnet. A fridge magnet is weak. It will not work. A rare earth magnet pulls hard. It finds hidden metal fast.
Deep Radar Scanners
Some smart tools use radar. They look deep in the wall. They skip the thick stone. They find the wood fast.
These tools cost a lot. But they save you stress. This Old House says they work well. They map the wall on your phone. They are very safe.
| Tool Name | Best Time to Use | Cost |
| Rare Earth Magnet | Finding hidden screws | Very Low |
| Radar Tool | Thick stone walls | High |
| Tape Measure | Finding 16-inch gaps | Low |
5 Ways: How to Find a Stud Behind Tile Safely
You want answers now. I have five great ways. I use these tricks daily.
1. Use the Rare Earth Magnet Trick
I love this trick. Buy a rare earth magnet. Tie a thin string to it. Now you have a small swing. Hold the string near the wall. Swing the magnet very slowly.
Move it left and right. Move it up and down. Take your time. The magnet will pull hard. It will stick to the wall. You just found a screw!
That screw sits in wood. Mark that spot. Use a dry marker. Look straight up from that dot. Swing the magnet there. Find one more screw. Now you have a clear line. That line is your safe wood stud.
2. Measure from the Wall Corner
Houses follow strict rules. Builders space wood beams out. They place them 16 inches apart. Find a wall corner. Corners always have solid wood.
Hook your tape measure there. Measure out exactly 16 inches. Make a tiny mark. Measure out to 32 inches. Make one more mark.
This math gives you a good guess. Check this spot with your magnet. I did this in my house. I measured 16 inches. I swung my magnet there. It stuck fast. The math works well.
3. Check the Power Plugs
Look at your wall. Do you see a power plug? Electricians attach these plug boxes to wood. They nail them right to the beam.
Turn off the room power first. Take off the plastic cover. Look in the dark box. See which side has big nails. That side touches the wood.
Draw a light line straight up from there. You just found the wood. It is a very smart trick.
4. Check the Floor Trim
Baseboards help you too. Look at the bottom wood trim. Look for tiny filled holes. Painters fill these nail holes with paste.
Follow those tiny holes straight up the wall. Those long nails go right into the wood. It is a nice visual clue. It points right to the safe spot.
| Look Here | What It Tells You |
| Wall Corners | Wood is always here |
| Power Plugs | Box nails touch wood |
| Floor Trim | Filled holes show lines |
5. Do the Glass Tap Test
Old builders use this trick. It takes real practice. I still mess it up. But it helps when magnets fail. Take a solid glass marble.
Tap the wall gently. Move slowly across the tiles. Listen to the sharp sound. An empty spot sounds deep. It has a tiny echo.
A solid wood spot sounds flat. It sounds dull. Try this on a plain wall first. Learn the sound difference. Then try it on the shower wall. Listen very closely.
Preparing Your Workspace
Do not rush the job. Prepare your room first. A clean room is a safe room.
Clear the Room
Move your rugs away. Move your towels away. Drilling makes fine dust. This dust gets everywhere.
Put a drop cloth down. Cover your sink drain. You do not want heavy stone pieces in your drain. It causes bad clogs.
Gather Your Tools
Put all your tools in one spot. Get your drill. Get your blue tape. Get your marker. Get a small spray bottle.
Fill the spray bottle with cold water. You will need this later. Do not look for tools while you work. Have them ready.
What to Do When Tools Fail
Sometimes you strike out. The wall is too thick. Do not panic. You have other choices.
Use Heavy Metal Anchors
Is your item light? Are you hanging a towel ring? You do not need wood for this. You can use a metal toggle bolt.
Drill a clean hole. Push the metal toggle inside. It opens up wide inside the wall. It grabs the cement board. It holds very strong. Do not use cheap plastic plugs.
Call a Local Pro
Some jobs are too risky. Hanging a heavy grab bar is risky. People pull hard on grab bars. If it falls, someone gets hurt.
Do not guess with safety. Call a local pro. They have better tools. They have lots of practice. Family Handyman says a pro keeps you safe. Paying a pro is smart. It costs less than a bad fall.
| Item Type | Do You Need Wood? | Fastener |
| Light Towel Ring | No | Metal Toggle Bolt |
| Heavy Mirror | Yes | Thick Wood Screw |
| Safety Grab Bar | Yes | Long Lag Screw |
My Worst Mistakes on Tile Walls
I want to be honest with you. I made bad mistakes in the past. I want you to learn from them.
I Trusted a Bad Tool
I used a cheap plastic tool once. It beeped loudly. I trusted it. I drilled a fast hole. I hit empty space.
There was no wood at all. I ruined a nice tile. I had to patch it. It looked very ugly. Never trust a cheap tool. Check it with a magnet first.
I Used the Wrong Drill Bit
Tile is hard like glass. A wood drill bit will not work. It will just spin fast. It will get very hot. It will crack the stone.
You must buy a diamond hole bit. It cuts a perfect circle. Keep the metal bit very wet. Spray it with cold water. Water stops the bad heat. Fast heat causes ugly cracks.
I Pushed the Drill Too Hard
I wanted to finish fast. I pushed my drill hard. The metal bit slipped quickly. It scratched the shiny wall.
Put blue tape on the wall first. Draw your mark on the tape. The tape gives the drill instant grip. It stops the scary slip. Go very slow. Let the sharp tool do the real work.
| Drilling Mistake | How to Fix It |
| Bit slips on wall | Put blue tape on the spot |
| Wall gets too hot | Spray cold water on bit |
| Hitting a hollow spot | Check with a magnet first |
Drilling the Perfect Hole
Finding the wood is step one. Drilling the hole is step two. Both steps matter.
Mark the Spot
You found the wood. Now mark the exact spot. Use your dry marker. Make a clear dot.
Cut a small piece of blue tape. Place it right over the dot. You can still see the dot through the thin tape. The tape protects the shiny wall.
Start the Drill Slowly
Hold your drill very straight. Do not tilt it. Pull the trigger very gently. Spin the bit slowly.
Spray cold water on the bit. Start cutting the top glaze. Once the bit bites into the stone, you can speed up slightly. Keep spraying water.
Clean the Dust
The drill will make wet paste. This is normal. It is stone dust and water.
Wipe it away with a rag. Keep the hole clean. Keep drilling until you feel a soft pop. You are through the stone. Now change to a wood bit. Drill into the soft wood.
Hanging Your Heavy Item
You made a perfect hole. Now you must hang your item. Do this carefully.
Insert the Screw
Take your thick wood screw. Push it through your wall bracket. Put it in the hole.
Turn the screw slowly. You should feel strong resistance. This means you hit the solid wood. Turn it until it sits tight. Do not over tighten it. You might crack the tile behind the bracket.
Test the Weight
Pull on the bracket. Use your hand. Give it a firm tug. It should not move at all.
If it wiggles, you missed the wood. You must stop. But if you used the magnet trick, it will hold tight. Hang your heavy mirror. Feel proud of your work.
Stay Safe While You Work
Wall secrets can hurt you. Finding wood is great. Finding a wire is bad. You must be very careful.
Watch for Hidden Water Pipes
Bathrooms have many hidden pipes. Pipes often run near the wood. Sometimes they run right through the wood. Look at your sink. Look at your shower head.
Water pipes run straight up from these spots. Do not drill right above a faucet. Do not drill right below a shower head.
If your drill pushes easily, stop instantly. Stop the drill motor. Look in the hole with a bright light. Bob Vila says never push a screw blindly.
Watch for Live Power Wires
Live wires hide near the wood too. Electricians staple them to the beams. Plugs give you big clues. Wires run straight up from the plugs.
Sometimes they run across the room. A radar tool shows these wires clearly. If you lack a radar tool, drill very slowly. Stop when you pass the tile. Probe the hole gently with a plastic stick.
How Different Walls Act
Not all walls are the same. Your method changes with the wall type. You must know your wall.
Thin Kitchen Walls
Kitchen walls use thin pieces. This is the easiest type. The wall is thin. A strong magnet works perfectly here.
It grabs the hidden screws very hard. You will feel the strong pull fast. This job takes just five minutes.
Thick Shower Walls
Shower walls use dense stone. They block cheap sensors fully. Tapping is very hard here. The sound does not change much.
You must use the strong magnet here. You must measure from the corners. Take your time. Dense walls crack easily.
Heavy Stone Walls
Natural marble is very thick. The glue behind it is thick too. Magnets often fail here. The screws are too deep. The magnet cannot reach them.
You must use a radar scanner for thick stone. Or you can look in the attic. You might see the wood beams from above.
| Wall Material | How Hard Is It? | Best Trick |
| Thin Kitchen Tile | Very Easy | Magnet Swing |
| Dense Shower Tile | Medium Hard | Math and Magnet |
| Thick Natural Stone | Very Hard | Radar Scanner |
Helpful Tips for Beginners
Are you new to this? That is okay. Everyone starts somewhere. I was scared at first too.
-
Buy two magnets just in case you lose one.
-
Practice tapping on a normal dry wall first.
-
Ask a friend to hold the spray bottle for you.
-
Never skip the blue tape step.
-
Wear safety glasses to block flying dust.
Final Thoughts
Learning how to find a stud behind tile takes time. You cannot rush it. I rushed it once. I broke my wall. Please take your time. Work smart.
Use the strong magnet trick first. It works almost every time. Protect your shiny wall with blue tape. Keep your drill bit wet. Stay safe. You can do this job well. Just trust the slow process.
Frequently Asked Questions (FAQs)
Can I use a normal stud finder on tile?
No. Cheap tools fail on thick tile. They get confused easily. You need a deep radar tool instead.
Will a strong magnet scratch my wall?
It might scratch it. Put blue tape over the magnet first. The tape protects your shiny wall perfectly.
What if I miss the wood completely?
You now have an empty hole. You cannot use a wood screw. You must use a heavy metal toggle bolt.
Do I need a special drill bit for this?
Yes. Normal bits will burn up. They will crack the wall. You must use a wet diamond hole bit.
How far apart are wall studs?
Builders space them exactly 16 inches apart. But custom bathrooms can change this rule. Always check your math twice.