
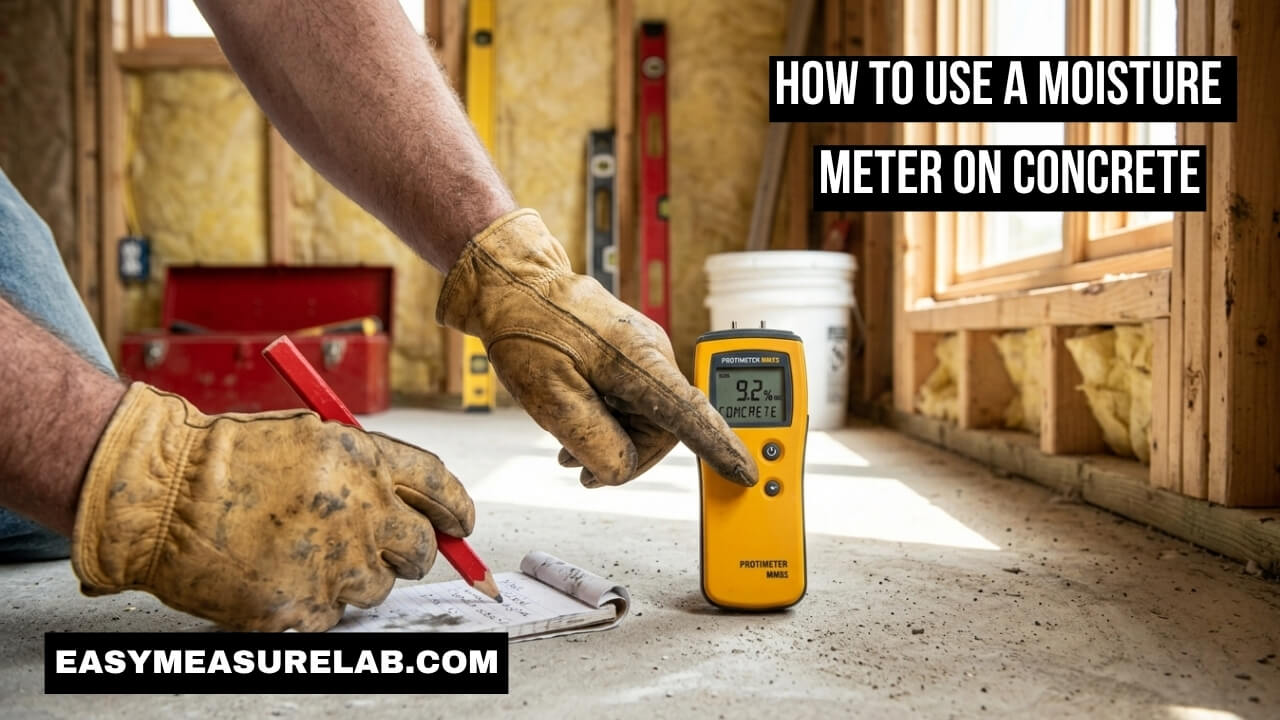
I ruined my first big flooring project. The concrete slab looked bone dry. It felt dry to the touch. I laid the expensive hardwood floor right over it. A month later, the wood warped. The boards buckled. It was a complete disaster. It cost me a lot of time and money to fix.
That expensive mistake taught me a hard lesson. You can never trust your eyes when it comes to concrete. Concrete acts like a giant sponge. It holds water deep inside. That is why learning how to use a moisture meter on concrete is so vital. It saves you from ruined floors, peeling paint, and mold. Today, I want to show you exactly how to test a slab the right way.
Why I Learned How to Use a Moisture Meter on Concrete the Hard Way
You might think a dry surface means a dry slab. I thought so too. But that is a huge myth.
The Hidden Danger of “Dry” Concrete
Concrete cures from the top down. The surface dries out quickly. The air pulls moisture from the top layer. But deep down, the slab can still be soaking wet.
When you put down a tight floor or a thick epoxy coating, you trap that water. The moisture has nowhere to go. It rises to the top. It breaks down the glue. It warps the wood. It makes the paint bubble. Knowing how to use a moisture meter on concrete stops this from happening. It gives you a look inside the slab.
Pinless Meters vs. In-Situ Probes: What You Need to Know
When I first bought a meter, I was confused. There are two main ways to test concrete.
The Fast Way vs. The Deep Way
You have surface meters and deep-hole probes. Both have a job to do. You need to know which one fits your project.
| Meter Type | How It Works | Best Used For |
| Pinless Surface Meter | Sends a signal 3/4 inch into the slab | Fast spot checks across a large room |
| In-Situ RH Probe | Goes deep into a drilled hole | Final testing before laying floors |
When to Use a Pinless Surface Meter
I love my pinless meter. It is fast. It is easy. It leaves no holes. It works by sending an electrical signal into the top layer of the slab.
I use this tool to map out a room. I walk around and press it to the floor. It tells me if there are wet spots near a door or a pipe. But it only reads the top inch. It does not tell me what is hiding at the bottom of the slab.
Step-by-Step: How to Use a Moisture Meter on Concrete
If you want to do a fast surface test, here is my routine. I do this on every job site now.
Step 1: Prep the Concrete Surface
You cannot test a dirty floor. The meter needs bare concrete to work right.
I sweep the floor. I scrape away old glue. I remove paint spots. The surface must be clean and smooth. If the meter sits on a bump of old thinset, it will give a bad reading.
Step 2: Calibrate Your Meter
Never skip this step. An uncalibrated meter is useless.
I turn my meter on. I check the battery. Some meters need you to select the material type. I make sure mine is set to “Concrete.” If I am using my Wagner Meters tool, I always verify it against the test block it came with.
Step 3: Take the Surface Reading
Now comes the easy part. I place the meter flat on the concrete.
I press down firmly. You need good contact. I wait a few seconds. The screen gives me a number. I write it down. I do this in several spots. I check the corners. I check the center of the room. I check near any outside walls.
| Mistake I Used to Make | My Better Approach Now |
| Testing just one spot | Testing every 100 square feet |
| Testing over old glue | Scraping down to bare concrete |
| Ignoring the room corners | Testing edges where water leaks in |
The ASTM F2170 Standard: Why the Pros Drill Holes
Surface meters are great for quick checks. But they are not enough for a big flooring install.
Moving Beyond the Surface
If you want the real truth, you have to dig deep. The industry gold standard is called the ASTM International F2170 test. This uses in-situ Relative Humidity (RH) probes.
Step 4: Drilling for In-Situ Probes
This part takes some work. You have to drill into the concrete.
I use a rotary hammer drill. I drill a hole down to 40% of the slab’s thickness. If my slab is 4 inches thick, I drill down about 1.6 inches. This depth is the sweet spot. It shows the true moisture level of the concrete.
Step 5: Cleaning and Sealing the Hole
You cannot just drop a sensor into a dusty hole. The dust will ruin the test.
I use a wire brush. I scrub the inside of the hole. Then I vacuum the dust out. I do this twice. The hole must be spotless. Then, I insert the plastic sleeve and cap it.
Step 6: Waiting It Out (The 24-Hour Rule)
This is the hardest part. You have to wait.
When you drill, the drill bit gets hot. This heat dries out the hole. If you test right away, the reading will be wrong. I always wait 24 hours. The air inside the hole needs to balance with the concrete.
Step 7: Reading the Relative Humidity (RH)
I come back the next day. I take the cap off the sleeve.
I push my RH probe into the hole. I wait a few minutes for the meter to settle. The screen gives me a percentage. This is the Relative Humidity of the slab. This number tells me if the floor is safe to install.
| RH Level Reading | What It Means for Your Floor |
| Under 75% | Safe for almost all floors |
| 75% to 85% | Safe for carpet, risky for wood |
| Over 85% | Too wet. Needs a moisture barrier |
Reading the Results: What Do the Numbers Mean?
Getting a number is easy. Knowing what to do with it is the real trick.
Making the Right Choice
Different floors handle water differently. Carpet breathes. Wood does not. Epoxy traps everything. You have to match your meter reading to your floor type.
| Floor Problem | Solution Based on Meter Reading |
| Wood floor buckling | RH is too high. Apply an epoxy vapor barrier. |
| Peeling floor paint | Surface is too wet. Run fans and dehumidifiers. |
| Glue not sticking | High moisture is breaking the adhesive. Wait for it to dry. |
How Temperature and Humidity Trick Your Meter
The room around you changes your test. I learned this on a winter job.
Cold air holds less water. Warm air holds more. If the building has no heat or AC running, your readings will be off. The room should be at normal living conditions for 48 hours before you test. Turn the HVAC on. Let the slab adjust to the room.
Common Mistakes When Testing Concrete Moisture
I have made almost every mistake you can make. Let me save you some grief.
Testing Too Soon After Pouring
New concrete takes a long time to dry. It does not happen in a week.
A good rule of thumb is one month of drying time for every inch of slab thickness. A four-inch slab takes four months to dry fully. If you test a two-week-old slab, you are wasting your time. It will always read wet. Wait for it to cure.
Ignoring the Depth Factor
Do not rely only on a surface meter for a hardwood install.
I know it is tempting. Drilling holes is noisy. It creates dust. But a surface meter only sees the crust. The bottom of the slab might be sitting in a puddle. Always drill if you are putting down wood or vinyl.
| Concrete Testing Myth | The Real Reality |
| A dry surface means a dry slab. | Moisture hides deep down and rises later. |
| The “plastic sheet” tape test works fine. | It is outdated and highly inaccurate. |
| One test hole is enough for a room. | You need 3 holes for the first 1,000 sq ft. |
Best Moisture Meters for Concrete I Trust
Not all tools are built the same. I have bought cheap meters. They broke or gave me bad numbers.
Features to Look For
If you do this often, spend the money on a good brand. I trust Delmhorst Instrument Co. and Wagner.
Look for a meter that has clear buttons. You want an easy-to-read screen. You want a tool that can take some abuse. Job sites are rough places.
| Meter Feature | Why It Benefits You |
| Backlit Screen | Easy to read in dark basements |
| Hold Button | Freezes the number if you cannot see the screen |
| Bluetooth App | Saves your readings directly to your phone |
Using the Data to Protect Yourself
If you are a contractor, these numbers protect your business.
I take photos of my meter readings. I write down the date and time. I save this in a folder. If a floor ever fails, I have proof that the slab was dry when I did the work. It is cheap insurance. The National Wood Flooring Association always recommends keeping these records.
Deep Dive: How the Weather Changes Your Slab
I want to share something that took me years to figure out. The weather outside changes the concrete inside.
The Winter Shrink
In the winter, the air is very dry. The heater in your house pulls moisture out of the air.
This makes the concrete release its moisture faster. If you test a slab in January, it might look perfectly dry. But what happens in July?
The Summer Swell
In the summer, it gets humid. The air is heavy with water.
Concrete will actually pull moisture back out of the humid air. The slab swells. The moisture level goes up. I once tested a basement in winter and got a great reading. The homeowner waited until August to install the floor. The floor failed. Why? Because the summer humidity soaked back into the slab.
| Season | How Concrete Reacts | My Recommendation |
| Winter | Dries out quickly, releases moisture | Test carefully. Keep HVAC running normally. |
| Summer | Absorbs humidity, stays damp longer | Run a strong dehumidifier before testing. |
| Spring/Fall | Fluctuates daily with rain | Wait for stable, dry days to take final readings. |
Why the Tape Down Test is Dead
When I first started out, older guys taught me the “plastic sheet test.”
The Old Way Fails
You tape a clear piece of plastic to the floor. You wait a day. If you see sweat under the plastic, the floor is wet. If it looks dry, you are good to go.
I used this method for a year. It failed me twice.
Why You Need Real Numbers
The plastic test does not give you a number. It is just a guess.
If the room is cold, the moisture might not sweat on the plastic. It just stays in the concrete. When you put down a warm floor later, the moisture rises. You need digital proof. You need an exact percentage. That is exactly why knowing how to use a moisture meter on concrete is non-negotiable today.
Final Thoughts
Learning how to use a moisture meter on concrete completely changed how I work. It took away the stress. I no longer lose sleep wondering if a floor will buckle or if paint will peel.
My biggest piece of advice is to never rush the process. Let the concrete cure. Drill the holes. Wait the 24 hours. Trust the numbers on your screen, not how the floor feels to your bare hand. Doing it right takes a little extra time, but it will save you thousands of dollars in the long run.
Frequently Asked Questions (FAQs)
How deep should a moisture meter read on concrete?
A pinless surface meter usually reads about 3/4 of an inch into the slab. If you use an in-situ RH probe, you should drill down to 40% of the total thickness of the concrete slab for the most accurate reading.
What is a safe moisture level for concrete?
For most flooring types, an RH (Relative Humidity) reading below 75% is considered safe. However, some hardwood floors require levels below 65%. Always check the specific requirements from your flooring manufacturer.
Can I use a wood moisture meter on concrete?
No. Wood meters are calibrated specifically for the density and makeup of wood. Using a wood meter on a concrete slab will give you wildly inaccurate readings. You must use a meter specifically designed with a concrete setting.
How long should concrete cure before I test for moisture?
A general rule is that concrete needs 30 days of drying time for every one inch of thickness. A standard 4-inch slab should cure for at least 120 days before you perform a final moisture test.
Why do I have to wait 24 hours after drilling a test hole?
Drilling creates heat and friction, which temporarily dries out the air inside the hole. You must cap the hole and wait 24 hours so the air inside can equalize with the moisture level of the surrounding concrete.