
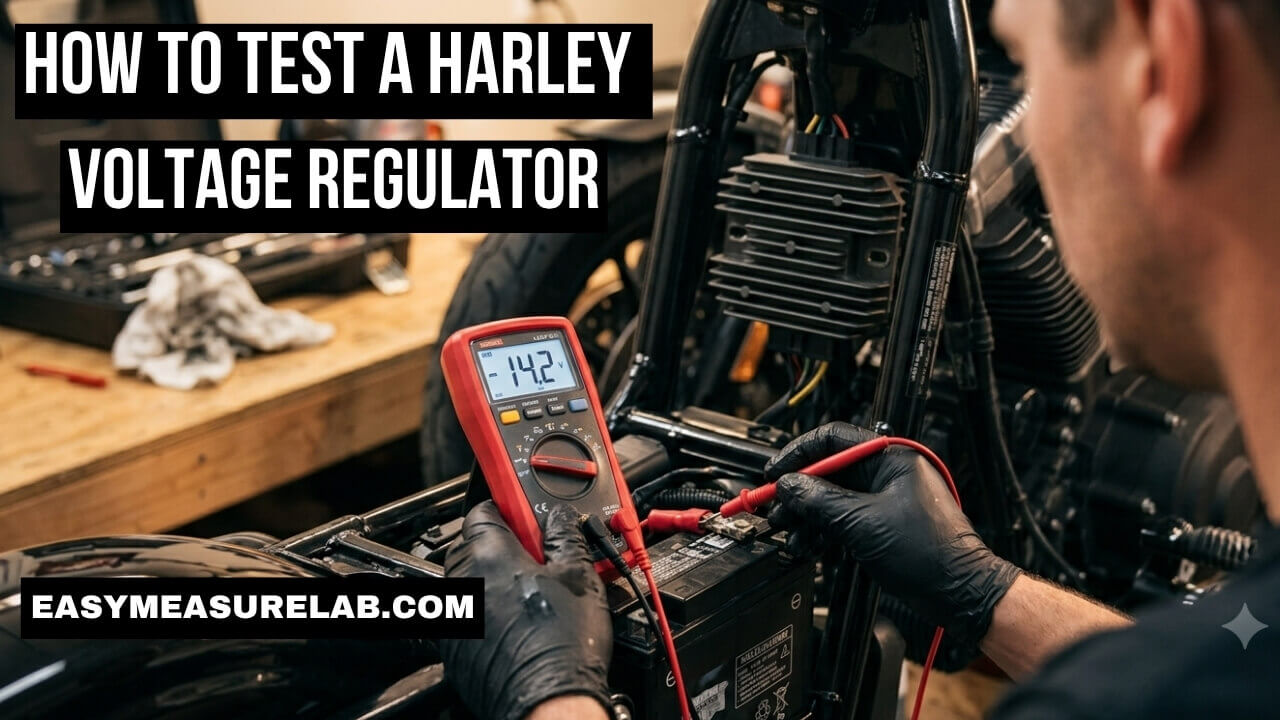
I love riding my motorcycle. But a dead battery ruins the trip fast. I learned this the hard way. My bike left me stuck on the side of a busy road. I thought my battery was just old. So, I bought a new one. Two days later, my bike died again. The real problem was my charging system. I had to learn how to test a Harley voltage regulator to find the truth.
This guide will save you time. It will save you money, too. You do not need to be a master mechanic. You just need a cheap tool and a little patience. I will show you the exact steps I use in my own garage. You will learn how to spot the bad parts before you waste cash. Let us get your bike back on the road.
Why Knowing How to Test a Harley Voltage Regulator Saves Cash
You can spend a lot of money guessing. Parts are not cheap.
Mechanics charge a lot of money per hour. They often replace the battery, stator, and regulator all at once. That bill hurts. If you test things first, you only buy what is broken. The regulator is a common point of failure. It sits right in the wind and heat. It takes a beating every single time you ride.
The Clear Signs I Missed
I ignored the early warnings. My bike gave me hints.
The lights on my dash looked dim. My headlight flickered at red lights. The starter sounded slow and weak in the morning. I blamed the cold weather. I was wrong. These are classic signs of low voltage. The bike was running off the battery alone. The regulator was not feeding power back to the battery.
| Symptom You See | What You Might Think | The Real Cause |
| Slow engine crank | Bad battery | Battery is not getting charged |
| Check engine light | Bad sensor | Voltage dropped too low |
| Bulbs burn out fast | Cheap bulbs | Regulator is feeding too much power |
Tools You Must Have for This Job
You do not need a massive tool box. Keep it simple.
You only really need one major tool. You need a digital multimeter. You can buy one at any auto parts store. Do not buy the most expensive one. A basic twenty-dollar meter works fine. You also need some safety glasses and basic hand tools. A service manual for your exact bike year is also a smart buy. It has the exact wiring diagrams for your model.
Understanding Your Multimeter
The meter looks scary at first. It has lots of symbols.
Do not panic. We will only use three settings today. We need DC voltage to check the battery. We need AC voltage to check the stator. We need Ohms to check for bad wires. That is it. The black probe goes in the COM port. The red probe goes in the V port. You are now ready to test.
Step 1: Always Check Your Battery First
Do not touch the regulator yet. The battery is the heart of the system.
You must start here. A bad battery will fail every charging test. It can even trick you into thinking the regulator is dead. Turn your bike off. Set your meter to DC volts. It looks like a V with straight lines above it. Put the red probe on the positive battery post. Put the black probe on the negative post. Read the screen.
The Numbers Do Not Lie
The voltage number tells a clear story. Read it closely.
A perfect, healthy battery shows 12.6 volts or higher. If you see 12.0 volts, the battery is completely dead. It has no power left. If your reading is low, you must put the battery on a trickle charger. Let it charge all night. If it still reads low the next day, the battery is junk. Buy a new one before you do any other tests.
| Battery Voltage | Battery Health | What You Must Do |
| 12.6 Volts or more | Great condition | Move to the next step |
| 12.2 to 12.4 Volts | Needs a charge | Charge it fully before testing |
| 11.9 Volts or less | Completely dead | Charge it or buy a new battery |
Step 2: The Idle Charge Test
Now we check if power flows to the battery. This is a big step.
Keep your meter hooked up to the battery. Keep it on DC volts. Start your motorcycle engine. Watch the screen on the meter. The numbers should change right away. At idle, the voltage should climb. It should sit around 13.0 to 13.8 volts. This means the system is waking up and sending power.
What If Nothing Happens?
Sometimes the screen stays flat. The number stays at 12.4 volts.
If the number drops slowly while the engine runs, you have a big problem. The bike is eating the battery juice to stay alive. The charging system is completely dead. Turn the bike off. We need to dig deeper. The problem is either the stator or the regulator.
Step 3: The High RPM Test
Motorcycles need engine speed to make real power. Idle is not enough.
Start the bike again. Tell a friend to help you hold the throttle. Rev the engine up to about 2,500 to 3,000 RPM. Hold it steady. Look at your meter. The voltage should rise fast. It should lock in around 14.2 to 14.5 volts. It must never go over 15.0 volts.
The Danger of Too Much Power
Low power kills batteries slowly. Too much power kills parts instantly.
If your meter shows 15.5 volts or higher, shut the engine off right now. Your voltage regulator is cooked. It has lost control. It is overcharging your system. This will boil your battery acid. It will blow your headlight bulbs. It can even fry your expensive engine computer. A high reading means the regulator must be replaced today.
| Meter Reading at 3000 RPM | System Status | Next Step |
| 13.8 to 14.5 Volts | Perfect | Go ride your bike |
| Stays below 13.0 Volts | Undercharging | Test the stator and regulator |
| Spikes over 15.0 Volts | Overcharging | Replace the regulator immediately |
Step 4: How to Test a Harley Voltage Regulator Directly
If your bike is undercharging, we must test the parts.
Find the voltage regulator on your bike. It sits at the very front of the frame. It has metal fins on it to stay cool. Follow the thick wire from the regulator back to the engine block. This is the stator plug. Unplug it. Now your regulator is separated from the engine power source.
The Diode Test
This test checks the internal gates of the regulator. It sounds hard but it is easy.
Switch your meter to the Diode setting. It looks like a little triangle with a line. This setting checks if power flows in one direction only. Put your red probe on a ground wire. Put your black probe inside the regulator plug holes. The meter should show a number around 0.5 volts.
Reversing the Probes
Now we do the exact opposite. We swap the probes around.
Put your black probe on the ground wire. Put your red probe in the plug holes. The meter should say “OL” or show no reading. “OL” means Open Loop. This is perfect. It means the gate inside the regulator is closed. If you get a number both ways, the regulator is broken. Power is leaking backwards.
Step 5: You Must Test the Stator Too
You cannot test the regulator without checking the stator. They work together.
The stator sits inside the engine behind the primary cover. It makes AC power. The regulator turns that into DC power. If the stator is broken, the regulator has no power to convert. You will think the regulator is bad, but it is just starving. We must test the stator output.
The AC Voltage Test
We need to catch the raw power coming from the engine.
Set your meter to AC volts. It looks like a V with a wavy line. Start your motorcycle. Put your two meter probes into the two holes on the engine side of the stator plug. Read the screen at idle. You should see about 16 to 20 AC volts. Now rev the engine to 2,000 RPM. The voltage should jump up to 32 to 40 AC volts.
| Engine Speed | Expected Stator AC Volts | What It Means |
| Idle (1000 RPM) | 16 to 20 AC Volts | Stator is working at idle |
| 2000 RPM | 32 to 40 AC Volts | Stator is making good power |
| 3000 RPM | 45 to 60 AC Volts | Stator is very healthy |
What Bad Stator Numbers Mean
Sometimes the numbers stay very low.
If you rev the bike and only see 10 AC volts, the stator is fried. Your regulator is probably fine. The stator is just not giving it enough juice. You will have to open the engine case to replace the stator. This is a bigger job. You will need oil and gaskets. You can learn more about engine cases from guides on RevZilla.
Step 6: The Stator Ground Test
A short circuit will ruin everything. We must check for this.
Turn the bike off. Switch your meter to Ohms. It looks like a little horseshoe symbol. Put your black probe on a bare metal spot on the engine frame. Put your red probe into one of the stator plug holes. Look at the meter screen.
The Only Acceptable Answer
You want to see a specific result here.
The meter should read “OL” or infinity. This means there is no connection to the frame. The power is staying inside the wires where it belongs. If the meter shows 0.00 or a low number, your stator is shorted to ground. The copper wires inside the engine melted. The power is leaking into the engine block. The stator is dead.
Step 7: Checking Your Ground Wires
A bad ground wire causes crazy electrical ghosts. I fought this for weeks.
The voltage regulator must bolt tightly to the frame. The frame is the negative path back to the battery. If the bolts are loose, the power cannot flow. If the frame is rusty or painted thick, the connection is bad. You can test a perfect regulator and still get bad charging if the ground is weak.
Cleaning the Connections
I always check the simple stuff first now.
Take a wrench and check the nuts holding the regulator. Are they tight? Look at the wire going from the regulator to the frame. Take it off. Use a small wire brush. Scrub the metal loop until it shines. Scrub the spot on the frame until it shines. Put it back together tight. You can find good electrical contact cleaners at places like J&P Cycles.
| Connection Point | Common Problem | Easy Fix |
| Regulator to Frame | Loose bolts | Tighten to factory spec |
| Ground strap | Dirty or rusty metal | Scrub with a wire brush |
| Stator Plug pins | Burnt or melted plastic | Clean or replace the plug entirely |
My Biggest Mistake When Testing
I rushed the job once. I did not check the main battery cables.
I tested the stator. It was good. I tested the regulator. It was good. But the battery kept dying. I was so angry. I finally looked closely at the battery. The negative cable bolt was loose. It was barely touching the post. Engine vibration made it bounce around. The fix took ten seconds. I wasted three hours testing everything else. Always check your tight cables first.
Heat is the Enemy
Regulators get very hot. They burn off extra power as heat.
That is why they sit on the front of the bike. They need cold wind. If you ride in slow traffic a lot, the regulator gets no wind. It bakes in the sun. Over time, the heat melts the parts inside. If your bike only drops voltage after riding for an hour, heat is the problem. A cold test in the garage might trick you. Test it when the engine is fully hot.
When to Just Buy a New Regulator
Sometimes you just know it is broken. Visual clues tell the truth.
Look at the back of your regulator. It is filled with a black rubber potting compound. This rubber seals out water and dirt. If that rubber is cracking, peeling, or melting out, the unit is dead. The heat destroyed the inside. You do not even need a meter for this. If it looks melted, throw it away.
Buying the Right Replacement Part
Do not buy cheap parts online. They will break fast.
I tried a cheap brand once. It lasted one month. Electrical parts need high quality. Buy an original Harley part or a top tier brand like Cycle Electric. They cost more money up front. But they last for years. You do not want to break down far from home just to save forty bucks. Trust me on this one. Read reviews on sites like Cycle World before buying parts.
| Part Choice | Pros | Cons |
| Cheap Online Brand | Very low price | Fails quickly, risks stranding you |
| OEM Harley Part | Exact factory fit | Higher price tag |
| Premium Aftermarket | Heavy duty, runs cooler | Most expensive option |
Final Thoughts
Learning how to test a Harley voltage regulator feels great. It gives you power over your machine. You do not have to rely on expensive shops for simple answers. A cheap digital meter is your best friend. Take your time. Follow the steps exactly. Check the battery first, then the stator, and finally the regulator.
The biggest lesson I learned is patience. Do not just throw new parts at a problem. Test the system. Trust the numbers on your screen. Clean your ground wires often. Keep your battery on a charger when you do not ride. If you do these simple things, your bike will always start. You will spend more time riding and less time fixing.
Frequently Asked Questions
Can a bad voltage regulator drain a battery while the bike is off?
Yes. If the internal diodes fail, the regulator can pull power backwards. It will drain a perfectly good battery overnight while the bike sits in the garage.
What happens if I ride with a bad voltage regulator?
Your bike will run on battery power alone. Once the battery drains, the engine will die completely. You will be stranded on the side of the road.
Does a voltage regulator get hot to the touch?
Yes, it is very normal for it to get hot. It turns excess electrical energy into heat. That is why it has metal cooling fins and sits in the open air.
Can a bad stator break a new voltage regulator?
Yes, it can. If the stator shorts out and sends dirty, massive power spikes, it can burn out the internal parts of a brand new regulator very quickly.
How long does a Harley voltage regulator usually last?
Most original factory regulators last about 5 to 7 years. Heat, heavy traffic, and poor ground connections will make them fail much faster.
1 thought on “How to Test a Harley Voltage Regulator: 7 Powerful Steps”