
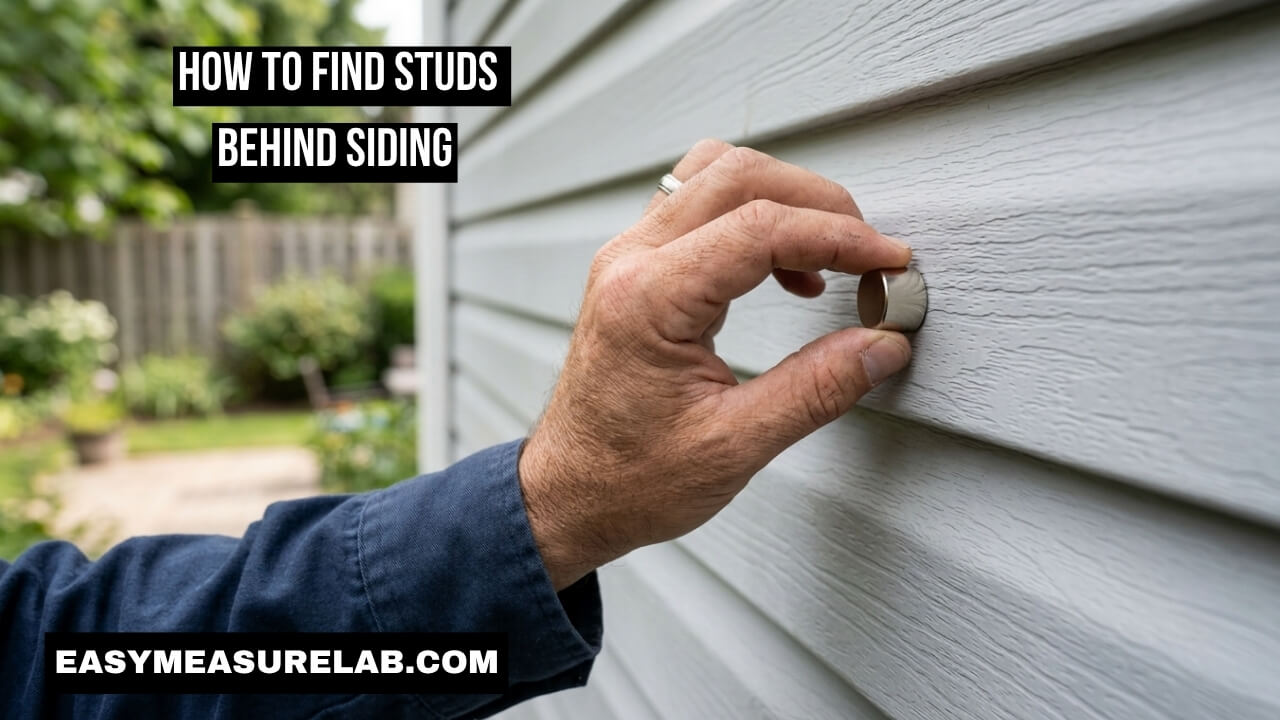
I still remember the loud crash. My new hose reel fell. It ripped a huge hole in my house. I was so angry. I thought I hit solid wood. I was wrong. I only hit thin foam board. That mistake cost me money. It also ruined my weekend. I knew I had to learn exactly how to find studs behind siding properly. You cannot guess. You cannot hope for the best.
Siding is just a weak skin. It stops rain. It blocks wind. It cannot hold heavy weight. If you want to hang a heavy TV outside, you need solid wood. If you want to hang a big awning, you need the frame. Today, I will teach you my secrets. I will show you seven real tricks. They work perfectly. You will never ruin your walls again.
Why Knowing How to Find Studs Behind Siding Matters
Every house has a wood frame. The frame uses thick wood boards. We call these studs. They stand up straight. They hold up your roof. They give your house its shape.
Builders cover the studs with flat boards. This is called sheathing. It is usually thin plywood. Sometimes it is just cheap foam. Then, they put siding over that. Siding is very thin. It only looks strong. If you drive a screw into just the siding, it will fall out. The wind will pull it. The weight will break it. You must hit the thick wood frame hidden deep inside.
| Action You Take | What Happens Next |
| Guessing the spot | Stripped holes and broken siding |
| Hitting thin sheathing | Screws hold for a day, then rip out |
| Hitting the wood frame | Your heavy item stays safe for years |
You must understand your wall. It has many layers. You have to get past the outside layer. You have to find the core. This keeps your home safe. It keeps your family safe. Falling items can hurt people. Let us look at the tools you need first.
Essential Tools You Need for This Job
You do not need costly gear. You do not need fancy gadgets. Basic tools work best. I keep these in my garage all the time.
You need a good tape measure. A twenty-five-foot tape works best. You need blue painters tape. It marks the wall safely. It does not peel the paint. You need a strong magnet. You need a basic drill. You need a tiny drill bit.
| Tool Name | Why You Need It Today |
| Tape Measure | To count the sixteen-inch gaps |
| Blue Painters Tape | To mark your spots safely |
| Rare-Earth Magnet | To find hidden steel nails |
| Basic Power Drill | To test the wall with a tiny hole |
Do not buy a cheap wall scanner. I will explain why soon. Grab your basic tools. Let us start with my favorite trick.
Trick 1: The Inside-Out Window Trick
This is the best trick I know. I use it every single time. It takes a little extra math. But it almost never fails.
You use the inside of your house. It tells you about the outside. Windows are your best friends here.
Find the Wood Inside First
Go inside your house. Walk to the room where you want to work outside. Find a window on that wall. Builders always put thick wood around windows. They double the wood for strength. You know there is solid wood right at the window edge.
Find the exact edge of the window frame. Put a small piece of blue tape on the floor below it. Now you have a starting line.
Measure Across the Wall
Studs follow a strict rule. They sit exactly sixteen inches apart. Some new houses use twenty-four inches. But sixteen is normal.
Take your tape measure. Hook it on your starting line. Pull it across the wall. Stop at sixteen inches. Put a piece of tape. Pull it another sixteen inches. Put more tape. Keep going. Stop when you reach the spot you want. Write the total distance on a piece of paper. Do not lose this paper.
Take the Math Outside
Now, walk outside. Go to the exact same window. Hook your tape measure on the outside window edge. Pull the tape across the siding.
Stop at the exact number you wrote down. Put a piece of blue tape on the siding. You just found the hidden wood frame. This is a huge part of learning how to find studs behind siding easily.
| Step Inside the House | Step Outside the House |
| Find the window edge | Find the exact same window edge |
| Measure in sixteen-inch steps | Measure the same total distance |
| Mark the baseboard | Put blue tape on the siding |
Trick 2: Spotting Siding Nails on Wood and Cement
This trick uses your eyes. Builders must attach the outside boards to the house. They use long nails. Good builders drive these nails straight into the wood frame.
If you find the nails, you find the frame. It is that simple.
Inspecting Wood Boards
Walk up close to your house. Look closely at the painted wood. You will see small bumps. You might see tiny round dips. These are painted nail heads.
Look up and down. Do you see a vertical line of these bumps? That straight line is your frame. Put a piece of tape right over the bumps.
Inspecting Fiber Cement
Fiber cement is very heavy. Builders use thick nails to hold it. Sometimes they hide the nails under caulk.
Look for small round spots of caulk. Look for slight dents in the paint. When you find one dent, look straight up. You will likely find another. You just mapped out the strong wood behind the wall.
Trick 3: The Vinyl Unsnap Technique
Vinyl is very tricky. You cannot see the nails. The plastic covers them up. The top panel locks over the bottom panel. It hides all the metal.
But you can beat this system. You can open the wall safely. I learned this great tip from reading Family Handyman.
How to Unsnap the Plastic
Go to the spot where you want to drill. Find the bottom edge of the plastic panel.
Push up gently with your thumbs. Pull slightly toward you. The plastic lip will pop loose. It unhooks from the panel below it. Do not pull too hard. Plastic can crack in the cold. Do this on a warm day.
Find the Hidden Nail Hem
Once it pops loose, lift it up a little bit. Look underneath. You will see a flat strip of plastic. It has many slots cut into it. This is the nail hem.
You will see nails driven through these slots. The nail goes straight into the wood frame. Look where the nail sits. Put a piece of blue tape directly below it. Now, simply snap the plastic lip back down. It locks into place. Your house looks perfect again. You found your target.
Trick 4: Using a Magnetic Stud Finder
Do not use a cheap battery scanner outside. Those tools measure wall density. Outside walls have too many layers. They have air gaps. They have thick plastic. They have foam. A cheap scanner will just beep like crazy. It will lie to you.
You need a magnet instead. This changed my life. I read about this on Bob Vila’s website a few years ago.
Why the Magnet Always Wins
A magnetic tool does not look for wood. It does not care about plastic. It only looks for steel. It finds the hidden steel nails holding your house together.
Buy a strong rare-earth magnet tool. It costs very little. It uses no batteries.
Sweeping the Wall
Hold the magnet flat against the wall. Move it in large circles. Move very slowly.
Suddenly, you will feel a pull. The magnet will stick to the wall. It just found a hidden nail head. Put a piece of tape there.
Now, move the magnet straight up. Move it exactly sixteen inches up. Does it stick again? If yes, you found a vertical line of nails. You found the thick wood frame.
| Tool Type | How It Works Outside | Accuracy |
| Cheap Battery Scanner | Gets confused by air and foam | Very Bad |
| Rare-Earth Magnet | Finds hidden steel nails easily | Very Good |
Trick 5: The Knuckle Tap and Listen Test
This is a very old trick. Carpenters have used it for fifty years. It is not perfect. But it helps you verify your math. I always use it as a backup check.
You use your ears for this one.
How to Tap the Wall
Make a fist with your hand. Use your hard knuckles. Tap firmly on the wall. Tap left to right.
Listen very closely to the sound.
Tap the space between the wood frames. It sounds hollow. It sounds loud. It makes an echo.
Now tap directly over the tape mark you made earlier. The sound changes completely. It sounds flat. It sounds dull. It sounds solid.
When the Sound Fools You
This trick works best on wood. It works great on fiber cement.
It does not work well on vinyl. Vinyl floats on the wall. It leaves an air gap everywhere. Tapping plastic just sounds like slapping plastic. Do not trust the tap trick on vinyl alone. Always use the magnet trick with it.
Trick 6: The Tiny Pilot Hole Test
This is the most important rule. Never skip this step. Never drive a huge lag screw into your wall without testing the spot first. That is exactly how I ruined my own house.
When you think you know how to find studs behind siding, you must test your theory. You must prove it.
Setting Up the Drill
Take your power drill. Find your smallest drill bit. A one-sixteenth inch bit is perfect. It is as thin as a needle. It makes a tiny hole.
Put the tiny bit in the drill. Place the tip on your blue tape mark. Hold the drill perfectly straight.
Feeling the Resistance
Squeeze the drill trigger slowly. Do not push hard. Let the tool do the work.
First, the drill will pop through the outside layer. That is easy. Next, it will hit the thin wood sheathing. It will push through that quickly.
Now, pay very close attention to your hands.
Does the drill suddenly spin super fast? Does it plunge forward into the wall? If yes, you missed. You hit empty air. Stop drilling immediately.
Does the drill slow down? Does it fight you? Does the motor sound louder? Do you see light wood shavings come out? If yes, you won. You hit the thick solid wood frame.
| What You Feel in the Drill | What It Actually Means |
| Fast spinning and falling forward | You hit empty air (You missed) |
| Strong pushback and slow spinning | You hit solid wood (You won) |
This tiny hole saves you from huge mistakes. Always drill a tiny hole first.
Trick 7: The 1-Inch Reset Strategy (When You Miss)
Do not panic if you miss. It happens to everyone. I miss the wood frame all the time. House frames are rarely perfect. Builders make mistakes. Wood warps over time.
If your tiny drill bit hits air, you just need a quick reset. You do not need to start over completely.
Moving Left or Right
Pull the drill out. The wood frame is usually one and a half inches wide. If you used the math trick, you are very close. You are probably just grazing the edge of the wood.
Move your drill bit exactly one inch to the left. Drill another tiny hole.
Did you hit solid wood this time? Great. You found the left edge.
If you still hit air, move two inches to the right of your very first hole. Drill again. You will almost certainly hit the wood this time. You are basically walking across the hidden board with tiny holes.
Why This is Safe
Because you used a tiny drill bit, the holes are invisible. No one will ever see them. You did not ruin the house. You just probed the wall safely. I will tell you how to fix these tiny holes a little later.
How Different Siding Materials Change the Rules
Every house is unique. The outside material changes how you work. You cannot treat plastic the same way you treat solid wood.
Knowing the material is a big part of learning how to find studs behind siding safely. Let us look at the big three materials.
Working With Vinyl Siding
Vinyl is very tricky. It expands in the hot summer sun. It shrinks in the freezing winter snow. It needs room to move.
If you screw a heavy item tight against plastic, the plastic cannot move. When the sun hits it, the plastic will buckle. It will warp. It will look terrible.
You must give the plastic room to breathe. When you find the solid wood, drill a larger hole just through the plastic. Make the hole in the plastic wider than your screw. Then, drive your screw through that wide hole into the wood. The plastic can now slide around the screw all year long.
Working With Solid Wood Boards
Wood is much easier. It sits totally flat against the frame. It does not slide around.
You can drive your screws tightly against wood boards. Just be careful not to crush the wood. If your item is very heavy, use a metal washer behind it. This spreads the weight out.
Working With Fiber Cement
Fiber cement is very strong. But it has a hidden danger. When you drill into it, it makes dangerous dust. It makes silica dust.
Breathing silica dust hurts your lungs. This Old House always warns home workers about this danger. You must respect it.
Always wear a thick mask when drilling cement boards. Wear safety glasses. Do not skip this. Your health is more important than a new awning.
Major Mistakes When Figuring Out How to Find Studs Behind Siding
I want to save you from my past failures. I have seen many people make the same errors. People rush the job. They skip the testing phase. They ruin their walls.
Here are the biggest mistakes you must avoid today.
| The Common Mistake | The Better Way to Do It |
| Trusting a cheap battery wall scanner | Buy and use a rare-earth magnet |
| Assuming sixteen-inch math is perfect | Always verify the math with a tiny drill hole |
| Driving huge lag screws immediately | Always drill a tiny test hole first |
Never rush. Take five extra minutes. Walk inside. Measure the window. Walk outside. Measure again. Use the magnet. Tap the wall. Drill the tiny hole.
If you do all of those steps, you will never fail. Rushing causes damage. Patience brings success.
How to Fix Small Holes in Your Siding
If you use Trick 7, you will have tiny holes in your wall. You must fix them. You cannot leave them open.
Water is the enemy of a house. Rain will find those tiny holes. Water gets inside. It rots the wood frame. It causes black mold. A tiny hole can cause thousands of dollars in damage over ten years.
You must seal every mistake hole immediately. It is very easy to do.
Fixing Plastic Walls
Go to the hardware store. Buy a tube of clear exterior silicone caulk.
Get a ladder. Go to your tiny hole. Squeeze one tiny drop of clear caulk onto your finger. Push it into the hole. Wipe it flat. It dries clear. No one will ever see it. The water stays out.
Fixing Wood and Cement Walls
Wood and cement are painted. Clear caulk looks shiny and weird on paint.
Buy a tube of paintable exterior caulk instead. Squeeze a tiny drop into the hole. Wipe it totally flat with a wet rag. Let it dry for two hours.
Next, find some leftover house paint in your garage. Dip a tiny artist brush in the paint. Dab it over the dried caulk. The hole vanishes completely. Your house is perfectly safe again.
| Siding Material Type | Best Way to Fix a Tiny Hole |
| Vinyl / Plastic | Clear exterior silicone caulk |
| Solid Wood | Paintable caulk or wood putty plus paint |
| Fiber Cement | Paintable exterior caulk plus paint |
Always clean up your mistakes. Do not be lazy here. Sealing the wall is just as important as finding the solid wood.
Getting the Right Screws for the Job
Finding the wood is only half the battle. You must use the right hardware.
Do not use drywall screws outside. They will rust in one month. They will snap in half. Your heavy item will fall.
You must buy exterior-grade structural screws. Look for screws that say “galvanized” on the box. Look for screws that say “decking” or “exterior” on the label. These have a special coating. Rain will not rust them. Snow will not break them.
Make sure the screws are long enough. The outside layer is thick. The air gap is thick. The thin sheathing is thick. You need a screw that reaches deep into the actual wood frame. Buy screws that are at least three inches long for heavy items.
Taking Safety Seriously Outside
Working outside has extra risks. You must be careful.
You are often on a ladder. Make sure the ladder is flat on the grass. Do not lean too far. Move the ladder instead of stretching your body.
Always wear safety glasses. When you drill into outside walls, chips fly back at your face. Paint chips can hurt your eyes. Plastic chips are sharp. Protect your vision.
Watch out for hidden wires. Your house has electrical wires inside the walls. They usually run flat against the side of the wood frame. This is why you must drill directly into the dead center of the wood frame. If you graze the edge, you might hit a wire. Take your time. Find the absolute center.
Final Thoughts on Your Project
Learning how to find studs behind siding changes everything. It gives you total confidence. You will never fear hanging things outside again.
I know it feels scary at first. Nobody wants to drill holes in their own home. I felt the exact same way. But when you follow the rules, the fear goes away. Use the window math trick first. Verify the math with a strong magnet. Confirm the spot with a tiny test drill hole.
If you take your time, you will win. Your new hose reel will stay perfectly locked to the wall. Your heavy TV will sit safely on the patio. Your house will stay beautiful and strong. Grab your tape measure. Grab your blue tape. Go out there and tackle your project today. You can absolutely do this.
5 SEO-Friendly FAQs
How far apart are exterior wall studs placed?
Builders place exterior wall studs exactly sixteen inches apart from center to center. Some newer homes use twenty-four-inch spacing to save lumber, but sixteen inches is the national standard for most homes.
Will a standard stud finder work through thick exterior siding?
No. Basic battery-powered stud finders measure density and get easily confused by foam boards, plastic layers, and air gaps outside. You must use a rare-earth magnetic stud finder instead.
How do you safely mount heavy things on vinyl siding?
You must find the solid wood frame behind the plastic. Drill a slightly oversized hole through just the plastic so it can expand in the heat. Then, drive a long exterior screw deep into the solid wood frame.
Can I just screw heavy items into the exterior wood sheathing?
No. Thin wood sheathing or plywood cannot hold heavy weight. Over time, wind, weather, and gravity will pull your screws out, ruining your outside walls and dropping your items.
What happens if I drill a pilot hole and miss the wood stud?
Do not panic. Move your drill one inch to the left or right and test again. Always fill your mistake holes with a small dab of exterior-grade caulk to prevent rain from rotting your walls.