
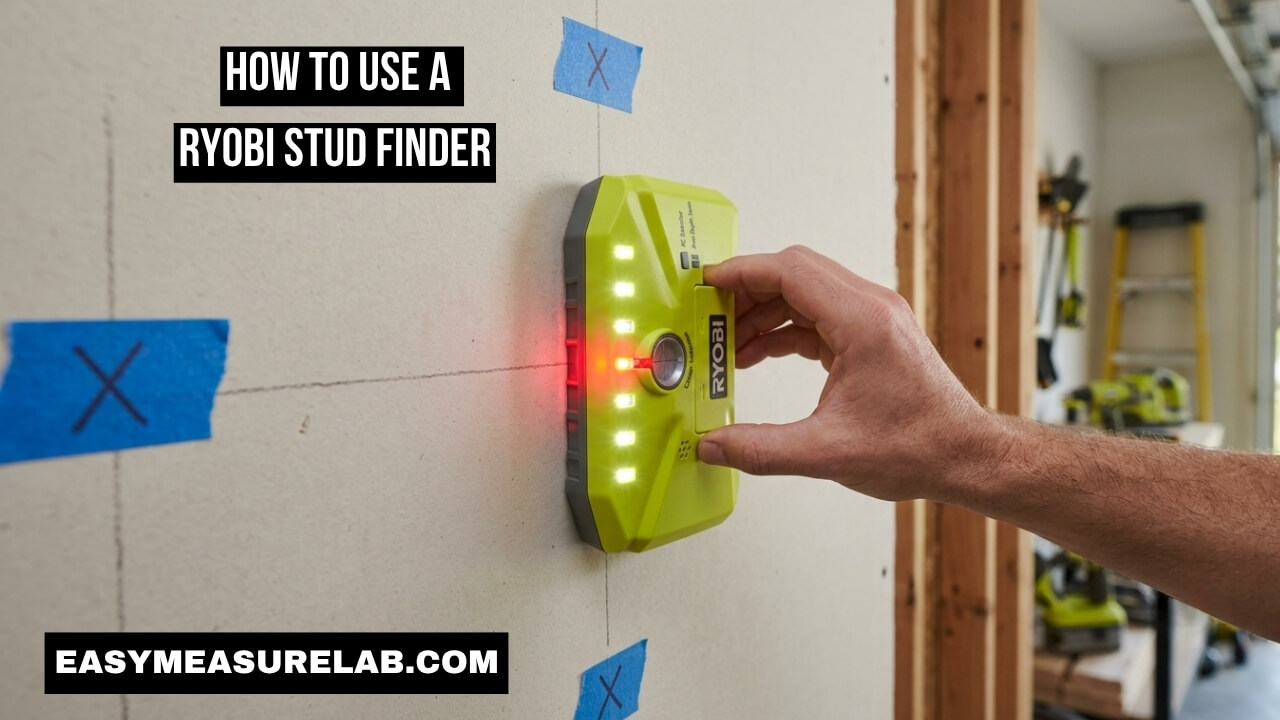
My wife brought home a huge vintage mirror last year. It weighed a ton. We also bought solid wood floating shelves for our heavy books. I knew plain drywall could not hold them. I needed to anchor them to solid wood behind the paint. I bought a tool to help me. I quickly realized that knowing how to use a Ryobi stud finder takes a specific touch.
My first few tries were bad. I made extra holes in my living room wall. I missed the wood completely. I sat down and read the manual. I tested different ways to hold the scanner. I finally figured out the secret. I want to share my real-world steps with you. This guide will save your walls and your time.
Why Knowing How To Use A Ryobi Stud Finder Matters
You must find solid wood to hang heavy things. Drywall is just chalk and paper. It crumbles easily under stress. A good wall scanner keeps your home safe. It stops things from crashing down.
Learning how to use a Ryobi stud finder properly saves you from doing extra work. Fixing drywall holes is messy. It takes days to dry and paint. A scanner helps you get it right the first time.
The Real Dangers Of Drywall Anchors
People love plastic wall anchors. I used to rely on them too. They claim to hold a lot of weight.
Do not trust them for very heavy items. Over time, plastic pulls out of the soft drywall. Your heavy mirror will fall. It will break. Always find real wood for the heavy stuff.
How Wall Scanners Actually Work
These tools do not see through walls. They do not have tiny cameras. They read the density of the wall.
They measure the static charge behind the paint. Wood changes the density of the wall space. The tool feels this change. Then, it lights up to tell you.
| Tool Myth | The Real Reality |
| It sees through walls | It only measures wall density changes. |
| It works on all walls | It struggles on thick plaster or metal. |
| It finds exact centers | It finds edges; you find the center. |
Preparing Your Wall For The Best Scan
You cannot just grab the tool and scan. You need to prep your workspace. The wall must be ready for the sensors.
Dust and bumps ruin the scan. The tool needs to slide very flat against the paint. A tiny gap will cause a false reading.
Clean The Surface First
Take a dry cloth. Wipe the wall where you want to scan. Remove dust and cobwebs.
Dust creates drag. The tool might stick to the wall. This makes the tool jump. A jumping tool gives bad readings.
Clear The Whole Area
Move your chairs. Move your tables. You need room to walk. You need room to move your arms.
You must slide the tool across a wide space. Do not trap yourself in a corner. Give yourself plenty of room to work smoothly.
Step-By-Step: How To Use A Ryobi Stud Finder Safely
This is the main event. You must follow these exact steps. If you skip one, the tool will lie to you.
I skipped steps on my first day. I paid the price with messy walls. Be patient. Take your time with every single step.
Step 1: The Proper Hand Placement
How you hold the tool changes everything. Your body has an electric charge. If your fingers touch the wall, the tool gets confused.
Hold the tool by its base. Keep your fingers firmly on the plastic grips. Keep your hand far away from the top sensors. Never touch the wall while you scan.
Step 2: Calibrating The Tool Properly
You must introduce the tool to your wall. It needs a baseline reading. Place it flat against the drywall.
Press the side button. Hold the tool totally still. The lights will flash. Now the tool knows what plain drywall feels like.
| Calibration Issue | How To Troubleshoot It |
| Tool beeps fast | You moved it. Hold it perfectly still. |
| All lights turn red | You started over wood. Move over a foot. |
| Tool acts dead | Change your batteries immediately. |
Step 3: Sliding At The Right Speed
Now you can move the scanner. Keep it flat. Do not tilt it. Slide it to the left or right.
Move it very slowly. I slide mine about one inch per second. If you rush, the sensors miss the density shift. Slow and steady wins the race.
Step 4: Reading The LED Lights
Watch the lights closely. As you slide, the lights will start to glow. The outer green lights come on first.
This means you found the edge of the wood. Keep sliding in the same direction. Wait for the center light to turn red.
Step 5: Using The Center Marker
Many Ryobi models have a hole in the middle. Some have an auto-marker pin. This is a brilliant feature.
When the red light hits, stop moving. Push the button to poke a tiny hole. Or, put your pencil in the hole to make a mark. You found the center.
| Feature | Real-World Benefit |
| Bright LED lights | Easy to see in a dark room. |
| Auto center pin | You do not have to hold a pencil. |
| Deep scan mode | Finds wood behind very thick drywall. |
Decoding The Lights On Your Ryobi Scanner
The lights are your only guide. You must understand what they are saying. They flash for different reasons.
I used to ignore the outer lights. I only looked for the center red light. That was a big mistake. The outer lights tell a story.
Green Lights Vs Red Lights
The green lights show you the mass of the wood beam. Wood beams are usually two inches wide. The green lights track that width.
When you see a green light, you are on the edge. The red light means you are dead center. Always aim for the red light to hang heavy mirrors.
The Live Wire Warning Message
This is a life-saving feature. Houses have hidden wires. You do not want to drill into a live wire.
Many models have an AC wire warning light. It flashes if electricity is near. Stop at once if this light turns on. Sites like Family Handyman suggest turning off your breakers if you suspect hidden wires.
Common Mistakes When Using A Ryobi Stud Finder
I made many errors at first. Tools only work well if the human uses them right. I want you to avoid my bad habits.
It is easy to get frustrated. If the tool beeps wildly, stop. Take a breath. You are likely making one of these simple mistakes.
Pressing Too Hard On The Wall
I used to push the tool hard against the paint. I thought it would read deeper. This is completely false.
Pushing hard makes the tool skip. It makes the felt pads grab the wall. Just hold it flat with light pressure. Let the tool do the heavy lifting.
Starting Over A Wood Beam
You must start the scan over an empty space. The tool needs to read hollow air first.
Sometimes, you place it right over a beam by blind luck. The tool sets its baseline to wood. When you move it, it finds nothing. Move it a foot away and try again.
| User Mistake | A Much Better Approach |
| Pressing hard | Use a light, gentle touch. |
| Sliding fast | Move one inch per second. |
| Starting anywhere | Start over a known hollow spot. |
Moving The Tool Too Fast
We are always in a rush. Do not rush this job. Swiping the tool fast ruins the scan.
The sensors need time to process the wall. If you go too fast, the lights will skip the center. Slow down your arms.
How To Handle Difficult Walls With Your Scanner
Not every house has perfect walls. My house has weird textures. Older homes have different materials entirely.
Standard drywall is easy to scan. Other walls fight back. You need to adjust your strategy for tough walls.
Dealing With Textured Drywall
Textured paint is bumpy. It makes the scanner bounce. When the scanner bounces, it loses its reading.
I use a simple trick. I place a thin piece of smooth cardboard on the wall. I put the scanner on the cardboard. I calibrate and slide it over the cardboard. It works like magic.
Older Homes And Plaster Walls
Plaster is tough. Older walls have wood strips behind the plaster. These strips confuse the scanner.
Sometimes, standard scanners cannot read through plaster. You might need to use a strong magnet instead. Magnets find the hidden nails in the wood. You can learn more about plaster issues on This Old House.
| Wall Material | How The Scanner Reacts |
| Standard Drywall | Perfect scans every single time. |
| Popcorn Texture | Bounces a lot. Use the cardboard trick. |
| Old Hard Plaster | Gives false reads. Use a magnet instead. |
Verifying Your Target Before Drilling
Never trust a scanner blindly. Even the best tools make mistakes. You must verify the wood is really there.
I always double-check my marks. It takes one extra minute. It saves me from drilling giant, useless holes in my living room.
The Small Nail Test
You found the center. You made your pencil mark. Now, grab a tiny finishing nail and a small hammer.
Tap the tiny nail into your mark. If it hits wood, it will stop and feel very solid. If it pushes through easily into empty space, you missed. A tiny nail hole is easy to hide with a drop of paint.
Checking The Standard Spacing Rule
Houses follow rules. Builders put wood supports at set distances. Knowing this helps you check your tool’s work.
Wood beams are usually 16 inches apart. Sometimes they are 24 inches apart. If you find one beam, measure 16 inches over. Scan there. If you find another, your tool is reading perfectly. Sites like Bob Vila explain framing rules in deep detail.
Keeping Your Tool In Perfect Shape
Tools need care. If you treat your scanner poorly, it will fail you. A dirty tool gives dirty readings.
I keep mine clean and safe. It always works when I need it. Good maintenance is easy and cheap.
Battery Life Matters
Low batteries ruin everything. Scanners need full power to push a signal through a wall.
If your tool acts crazy, change the battery. A fresh 9-volt or AA battery fixes almost every glitch. I change my batteries once a year. The Home Depot recommends removing batteries if you store tools for a long time.
| Device Symptom | Likely Cause |
| Dim green lights | Batteries are getting very low. |
| Eratic fast beeping | Dirty sensors or low power. |
| Scanner will not turn on | Dead batteries. Replace them now. |
Storing It Safely
Do not throw this tool in a messy drawer. It has soft felt pads on the back. It has delicate sensors inside.
Keep it in a small box. Keep it dry. Do not let dust build up on the back pads. Dust ruins the smooth sliding action.
Why The Built-In Marker Is A Game Changer
Hanging heavy items takes two hands. You hold the level. You hold the drill. You hold the heavy shelf.
You run out of hands quickly. That is why I love the Ryobi center marker. It frees up your hands.
Ditch The Pencil Balancing Act
Old scanners made you use a pencil. You held the tool with one hand. You tried to mark the wall with the other.
It was clumsy. Often, the tool moved while you tried to mark the spot. You lost your perfect center reading.
One Press Perfect Marks
With the newer Ryobi models, you just press a button. The tool stays flat. It stays perfectly still.
A tiny pin comes out. It pricks the paint perfectly. Your mark is tiny, clean, and totally accurate.
Practical Habits For Bigger Projects
Hanging one mirror is fast. Doing a whole room takes planning. I recently built a whole wall of heavy bookshelves.
I needed to find every single beam in the room. I developed a system. It made the big job go much faster.
Map The Whole Wall First
Do not scan, drill, scan, drill. That takes too long. Scan the whole wall first.
Find every single support beam. Mark them all with the pin. Use a long level to draw faint lines down the wall.
Step Back And Look
Once the wall is marked, step back. Look at your faint pencil lines. They should look even.
If one line looks too close to another, check it again. The spacing should be 16 inches all the way across. This visual check stops huge mistakes before you drill.
Handling False Positives And Glitches
Sometimes the tool lies. It finds a pipe. It finds a plastic box. It tells you it found wood.
You have to outsmart the tool. You have to think about what lives behind your drywall.
Scanning Vertically
Wood beams run straight up and down. Pipes can run sideways or at angles.
When you find a spot, mark it. Move your tool up a foot. Scan again. If the spot moved left or right, it is not a wood beam. It is likely a pipe. Avoid it.
Avoid Bathrooms And Kitchens If Possible
Walls near sinks are full of pipes. Walls near stoves are full of heavy wires.
Be extra careful here. Always check for the red AC wire warning light. Use the tiny nail test every single time in these rooms.
Final Thoughts
Learning how to use a Ryobi stud finder took a little patience. I had to unlearn some bad habits. Once I slowed down, everything got easier. I do not fear hanging heavy things anymore.
My best advice is to take your time. Clean your wall. Use fresh batteries. Move the scanner at a snail’s pace. If you follow these simple steps, your heavy mirrors and shelves will stay on the wall forever.
Frequently Asked Questions
How do I turn on my Ryobi stud finder properly?
Hold the tool completely flat against your drywall. Press and hold the power button on the side. Wait for the green lights to flash before you move it.
Why does my tool beep wildly when I turn it on?
You probably placed it directly over a wood beam. The tool needs empty space to calibrate. Move the tool one foot to the left and try again.
Can I use this scanner on a textured ceiling?
Yes, but it is tricky. The texture makes the tool bounce. Place a thin, smooth piece of cardboard on the ceiling and slide the scanner over that.
What does it mean if the AC light flashes?
The tool senses live electricity behind your paint. This is a warning. Do not drill or pound nails anywhere near that exact spot.
How do I know if I actually found real wood?
The safest way is the small nail test. Tap a tiny finish nail into your marked spot. If it hits hard wood, you found it. If it pushes into empty space, you missed.