
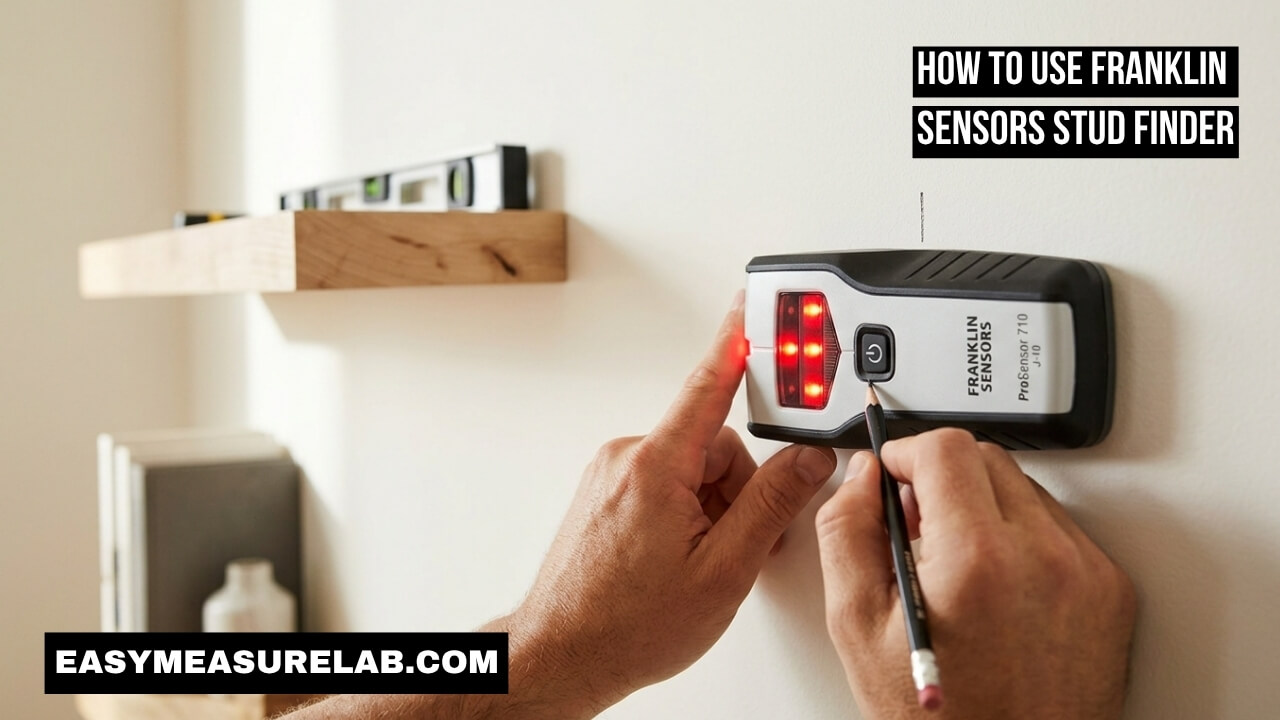
SEO Title: How to Use Franklin Sensors Stud Finder: 1 Easy Guide
Meta Description: Want to hang shelves safely? Learn how to use franklin sensors stud finder correctly. I share my top tips, common mistakes, and 1 easy step-by-step method.
URL Slug: /how-to-use-franklin-sensors-stud-finder/
Hanging floating shelves used to scare me. I worried my heavy books would pull the shelf down. The drywall would rip. The shelf would crash to the floor. I tried tapping on the wall. I guessed where the hidden wood was. It did not work well. I drilled too many bad holes. My walls looked like Swiss cheese.
Then I bought a new tool. It was a game changer. I learned how to use franklin sensors stud finder models properly. It completely changed how I work. I want to share my exact steps with you. You will learn how to find wood easily. You will hang your shelves safely. Your heavy books will stay on the wall.
Why I Switched to This Tool for Shelves
I used to use cheap wall scanners. They only had one sensor inside. They beeped a lot. Half the time, the beep was wrong.
Floating shelves need strong support. You must bolt them directly into solid wood. If you miss the wood, the shelf will fail. A normal drywall anchor cannot hold a heavy shelf full of books. You need a better tool for this job.
Seeing the Full Wood Width
Old tools just find the edge of the wood. You have to guess where the center is. This is very risky.
Franklin models have many sensors built right in. They light up across the whole width of the wood. You see the entire piece of wood behind the wall. This makes your job much easier. You know exactly where to drill.
| Old Tool Feature | Franklin Feature | Why It Matters |
| One tiny sensor | Multiple sensors | You get a wider view |
| Finds one edge | Finds the whole stud | You can find dead center |
| Lots of false beeps | Very accurate lights | You drill fewer bad holes |
Exactly How to Use Franklin Sensors Stud Finder Safely
Using this tool is very simple. But you must follow a strict routine. If you skip a step, the tool gets confused.
I use this exact method every time. I hang a lot of shelves. This method never fails me. Here is what you need to do.
Step 1: Put It Flat on the Wall
This is the most important rule. Never press the button while holding the tool in the air.
Place the scanner completely flat against the drywall first. Make sure the smooth pads on the back touch the wall. Do not tilt it. Keep it perfectly flat.
Step 2: Hold the Power Button Down
Now, press the power button. Keep holding it down with your thumb.
Do not let go of the button. The tool calibrates when you press it. It reads the density of the drywall right there. If you let go, it turns off.
Step 3: Slide It Slowly
Keep your thumb on the button. Slide the tool slowly to the left or right.
Move it in a straight line. Do not lift it off the wall. Keep it flat. If you lift one edge, the sensors will mess up. Move slowly so the tool can read the wall.
Reading the LED Lights
As you slide the tool, the lights will turn on. These lights show you what is behind the wall.
If no lights turn on, there is only empty space. If the lights flash, you found something solid. You need to know what these lights mean.
Finding the True Center
A normal piece of wood framing is one and a half inches wide. On this tool, that usually lights up three LED lights.
When three lights turn on, you found a standard wood stud. Stop sliding. Look at the middle light. That middle light is the exact center of the wood. That is where you want to drill your hole.
| Light Pattern | What It Means | My Advice |
| No lights on | Empty wall space | Keep sliding the tool |
| One light blinks | You found an edge | Move slowly to find the rest |
| Three solid lights | Standard wood framing | Mark the middle light |
Common Mistakes When You Learn How to Use Franklin Sensors Stud Finder
I made a lot of dumb mistakes at first. I got angry at the tool. Then I realized I was just using it wrong.
You can avoid my headaches. Learn from my early mistakes. Here are the things you must never do.
Scanning Over Thick Wall Texture
My old house had very thick, bumpy paint. I tried to scan over it. The tool lit up everywhere.
The bumps keep the tool from sitting flat. It creates tiny air gaps. The sensors hate air gaps. If your wall is very bumpy, place a piece of thin cardboard on the wall first. Slide the tool over the cardboard.
Letting Go of the Button
This sounds silly, but I did it often. I would find a stud, then let go of the button to grab my pencil.
The moment you let go, the lights turn off. You lose your spot. You have to start all over again. Keep holding the button until you mark the wall.
| The Mistake | Why It Happens | The Better Approach |
| Pressing button in air | The tool calibrates to thin air | Put it flat on the wall first |
| Moving too fast | The sensors miss the density change | Slide the tool very slowly |
| Letting go to mark | You lose your exact spot | Hold it down while you mark |
Dealing with Strange Wall Types
Not every wall is made of smooth drywall. Some houses are very old. Some houses use weird materials.
I have tested this tool on many different walls. It works great on most. But it struggles on a few. You need to know your wall type. You can learn more about wall types from experts at This Old House.
Plaster and Lath Walls
Old houses have plaster walls. Plaster is spread over thin strips of wood. These strips are called lath.
This tool sees all that wood. It will light up the whole wall. It is very hard to find the main vertical wood beams. For plaster walls, you usually need a strong magnetic finder instead.
Metal Studs in Apartments
Many big apartment buildings use metal framing. They do not use wood.
The good news is that your scanner will find metal just fine. The sensors look for thick density. Metal is very dense. The lights will turn on. But remember, you cannot use wood screws in metal. You need special screws.
| Wall Material | Will This Tool Work? | My Advice |
| Standard Drywall | Yes, perfectly | Follow the normal steps |
| Plaster and Lath | No, it will fail | Use a heavy magnet instead |
| Apartment Metal | Yes, it finds it | Buy screws made for metal |
Avoiding Hidden Pipes and Wires
Your tool does not actually know what wood is. It just feels for something solid.
That means it will also find plastic water pipes. It will find thick electrical wires. You do not want to drill into a water pipe. That will ruin your day.
Watching the Light Count
A normal piece of wood turns on three lights. A pipe or a wire is much thinner.
If only one or two lights turn on, stop right there. The object is too narrow to be wood. It is probably a pipe or a wire. Do not drill there. Move over and find a wider spot.
| Number of Lights | Typical Width | Likely Hidden Object |
| 3 lights | 1.5 inches wide | Normal wood framing |
| 1 or 2 lights | Under 1 inch wide | Water pipe or power wire |
| 5 or more lights | Over 2 inches wide | Double wood near a window |
My Best Tips for Hanging Floating Shelves
Now you know how to find the wood safely. Next, you need to hang your shelves perfectly straight.
Floating shelves look best when they are perfectly level. A crooked shelf looks awful. Books will slide off. Here are my top tricks for a perfect shelf install.
Marking Your Spots
When you find the center of the wood, make a small mark. Use a pencil. Do not use a pen.
Draw a tiny vertical line. Do this for the left stud. Do this for the right stud. Now you have two marks on your wall.
Using a Good Level
You need a long level. Do not use a tiny one. A long level is much more accurate. Experts at Family Handyman always suggest using a laser level or a long spirit level for shelves.
Place the level across your two pencil marks. Adjust until the bubble is right in the middle. Now draw a light horizontal line through your vertical marks. This creates a perfect crosshair for your drill bit.
Drilling Pilot Holes
Never drive a big screw right into the wall. It can split the hidden wood.
Use a small drill bit first. Drill a small hole exactly on your crosshair mark. You should feel the drill bite into solid wood. If it spins freely, you missed the wood. This small hole is called a pilot hole. It guides your big screw in perfectly straight.
Fixing Weird Tool Behaviors
Sometimes, the scanner acts a little crazy. Usually, there is a very simple fix.
Do not panic if the lights flash wildly. You just need to reset the tool or check its power source. Here is how I fix common problems on the job.
Changing the Batteries
If the lights flicker fast, the batteries are dying. These tools use a lot of power.
The multiple sensors drain batteries quickly. When the power gets low, the tool cannot read the wall well. Keep fresh AA batteries in your toolbox. A new set of batteries fixes the flicker every time.
Resetting a Bad Scan
If you press the button and all the lights stay on solid, you made a tiny mistake.
You probably placed the tool directly over a piece of wood before you turned it on. The tool thinks the whole wall is made of wood. Just move the tool three inches to the left. Let go of the button. Press it again to restart the scan.
| Issue | Likely Cause | Troubleshooting Step |
| Lights flicker very fast | Batteries are too weak | Put in brand new batteries |
| All lights stay on solid | Started on top of wood | Move over 3 inches and try again |
| Tool reads absolutely nothing | Tool is tilted off wall | Press it flat against the drywall |
Final Thoughts
Learning how to use franklin sensors stud finder models is very easy. It just takes a little practice. Always keep the tool flat. Never let go of the button while sliding. Move slowly and watch the lights. If you follow these simple rules, you will never miss a stud again.
Hanging floating shelves is much less scary now. I trust my scanner completely. I know exactly where my screws are going. My shelves hold heavy books without any issues. Take your time, mark your centers carefully, and your DIY projects will look amazing. You can learn more home repair tips at Bob Vila.
Frequently Asked Questions (FAQs)
How to use franklin sensors stud finder on a bumpy wall?
Place a thin piece of smooth cardboard flat against the bumpy wall. Press the tool onto the cardboard, hold the button down, and slide it slowly.
Does this tool find metal pipes and wires?
Yes. It finds any dense object behind the drywall. If only one or two lights turn on, it is likely a thin pipe or wire. Do not drill there.
Why do all the lights flash at the same time?
You probably turned the tool on while it was resting right over a piece of hidden wood. Move the tool a few inches to an empty spot and try again.
Can I use this scanner on thick plaster walls?
No, it does not work well on plaster and lath walls. The tool will read the horizontal wood lath strips and light up the entire wall.
Why do the lights keep flickering while I slide it?
Flickering lights usually mean the batteries are very low. The sensors need strong power to work right. Put fresh batteries in the tool.