
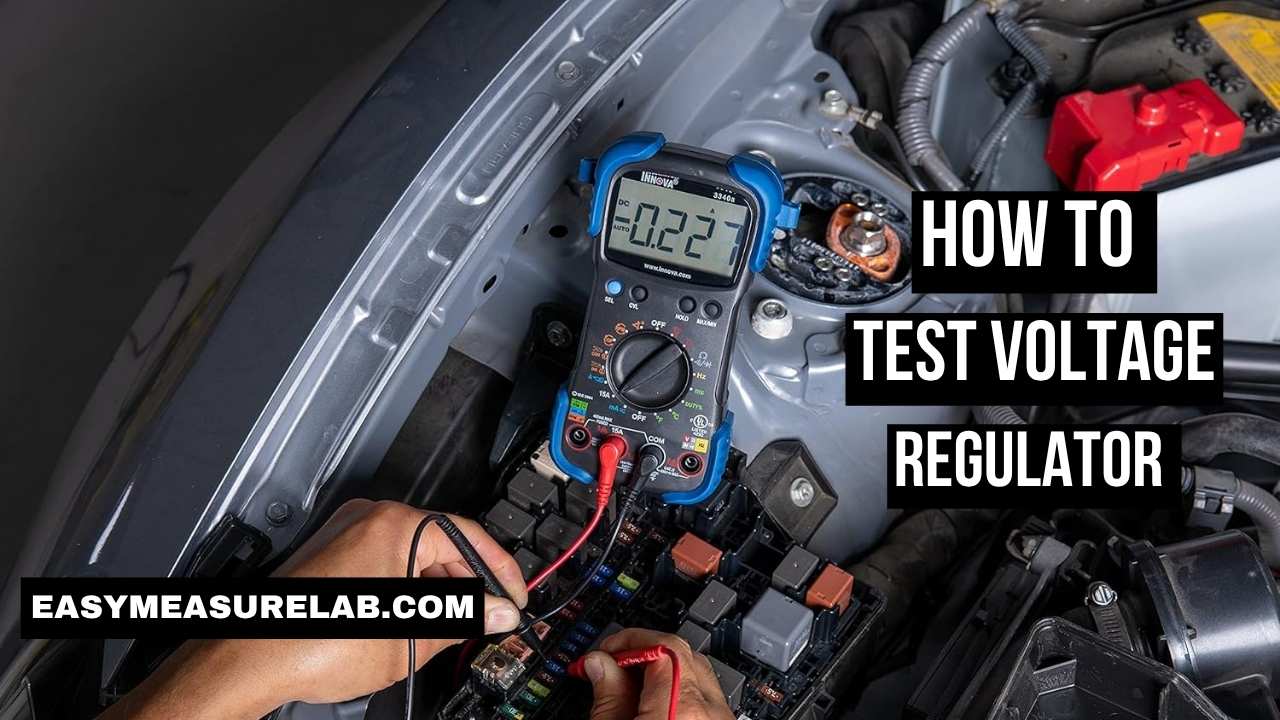
Do you have a dead car? I did too. My bike died on the road. I was mad. I got a new battery. It died the next day. The battery was fine. The charge part was bad. I had to learn how to test voltage regulator parts. I learned it the hard way.
You might be in the same boat. Your car keeps dying. You might smell bad eggs near the hood. That is a bad sign. Do not fret. I will show you what to do. It is quite easy. You do not need a pro mechanic. You just need one tool and five minutes.
Why Your Charge System Is Key
Your battery holds power. It does not make power. Your engine makes the power. The engine spins a part. This part makes raw power.
This raw power is wild. It jumps up and down. Your car can not use it. The voltage regulator steps in. It calms the wild power. It makes the flow safe. It keeps your battery safe from a bad cook.
Bad Signs You Must Check Now
Do not guess. Look for the signs. Your car will tell you when it is sick. I missed the signs once. It cost me a lot of cash.
| Bad Sign | What It Means |
| Dim lights at idle | The system lacks power |
| Bulbs blow out fast | The power is too high |
| Bad egg smell | The battery acid boils |
Stop driving if you see these signs. Stop using the device. You need to grab your tools. It is time to fix it.
The Best Tools for the Job
You do not need a big garage. You do not need rich gear. I keep a small bag of tools for this job. You might have them in your house right now.
You need a good meter. If you lack one, read the Fluke guide on basic meters. A good meter is your best friend.
| Tool Name | Why You Need It |
| Digital Multimeter | To read exact power numbers |
| Safety Glasses | To save your eyes from acid |
| Service Book | To know your exact numbers |
Put fresh batteries in your meter. A weak meter gives bad facts. That will waste your time. I lost three days once due to a weak meter.
Stay Safe: Do Not Skip This Part
Batteries hold a ton of juice. A car battery can melt steel. It can start a big fire. You must treat it with care. The Battery Council sets clear safety rules that you should read.
Wear your safety glasses. Keep all sparks far away. Wet batteries make gas. This gas can blow up. Work out in the yard. Never work in a closed room.
Take off your rings. Take off your steel watch. Metal can cause a short. A short will burn your skin fast. Be smart. Stay safe.
Step-by-Step: How to Test Voltage Regulator Systems
This is the main event. We will test the part on the car. This way works for cars. It works for bikes. It works for yard mowers.
You must follow these steps in order. Do not skip ahead.
Step 1: Charge Up the Battery
You can not test a charge system with a dead battery. The part needs base power to wake up.
Charge your battery full. Use a wall charger. If the battery will not hold a charge, buy a new one. A bad battery makes a good part look bad. I learned this the hard way. I swapped a good part because my battery was dead.
Step 2: Check the Rest State
Turn your car off. Take the keys out. Grab your test meter.
Turn the meter dial. Set it to 20 DC Volts. The mark is a V with a straight line on top.
Put the red probe on the plus post. Put the black probe on the minus post. Look at the screen. A full battery should show 12.6 volts. If it is low, charge it more.
Step 3: Check the Idle State
Now, we start the car. Put the car in park. Set the hand brake tight.
Start the engine. Let it run low. Keep the probes on the posts. Red on plus. Black on minus.
Look at the meter. The power should go up. It should pass 12.6 volts. Most times, it will sit near 13.5 to 14.5 volts. This means the system pushes power to the battery.
Step 4: Check the High Rev State
Now we test the part hard. You will need a friend to help. Or, you can pull the gas cable by hand.
Rev the engine safely. Take it up to 3,000 RPM. Hold it right there. Watch the meter screen close.
The power should rise a bit. But it must stop. It should hit a hard roof. This roof is near 14.5 to 14.8 volts. Check your car book for the exact cap.
If you want to measure the current output more safely, read my guide on digital clamp multimeter how to use.
| Test Number | What It Means |
| 13.5 to 14.5 | The system works great |
| Stays low | The system fails to charge |
| Climbs high | The part is fully broken |
How to Test the Part on a Bench
Sometimes, the car test is not enough. You might need to test the part off the car. This is very common for bikes.
Bikes use a joint part. It has wires on the side. We can test it with the diode mode on our meter.
How to Set the Diode Test
Look at your meter dial. Find the diode mark. It looks like a dart pointing at a wall. Turn the dial here.
This test checks the internal doors. Power should flow one way. It should block power the wrong way.
How to Probe the Wires
Your part has in wires and out wires. The in wires come from the engine. They are all the same hue. Yellow is a common hue.
The out wires go to the battery. Red is plus. Black or green is minus.
Put your red probe on the red out wire. Touch your black probe to each yellow in wire. Look at the meter. You should see no numbers. The meter should say “OL”.
Now, flip the probes. Put the black probe on the red wire. Touch the red probe to the yellow wires. You should see a number now. It is near 0.500.
If power flows both ways, the part is bad. If power flows no ways, the part is bad. It must act like a one way road.
Small Tech Part Tests
Maybe you do not work on a car. Maybe you fix a small tech board. Small tech uses tiny parts.
The LM7805 chip is very popular. It takes high power and turns it to a flat 5 volts. Testing these is very easy. You just need to know the pins.
How to Find the Pins
Hold the tiny part. Face the flat side to you. The pins point down.
| Pin Spot | What It Does |
| Left Pin | Power goes in |
| Mid Pin | The ground path |
| Right Pin | Power comes out |
How to Probe the Chip
Give power to the board. Do not let the pins touch.
Set your meter to 20 DC Volts. Put the black probe on the mid pin. Keep it there.
Touch the red probe to the left pin. You should see your base power. Maybe 9 volts. This means power hits the chip.
Now, touch the red probe to the right pin. You should see just 5 volts. If you see 5 volts, the chip works. If you see 0 volts, the chip is dead. If you see 9 volts, the chip is blown. A blown chip will fry your whole board.
For more deep tech help, the IEEE rules on board faults give great insight.
Silly Mistakes I Made
I have wrecked a lot of parts in my life. I made dumb faults. I want to save you from my pain. Test work can trick you.
| Bad Move | Better Choice |
| Test a dead battery | Fill it up with a wall plug first |
| Skip the rust check | Scrub all the ground bolts clean |
| Poke blind wires | Find a map for your car first |
Rust is a stealth killer. A rusty bolt blocks the flow. It acts like a bad part. I once bought a brand new part. I put it on. The fault was still there. I took a wire brush to the bolt. The fault left fast. Always check your grounds first.
Do not use a cheap meter. A five dollar meter will lie to you. Spend more cash on a good one. It is worth the peace of mind.
Why Do These Parts Fail?
No part lasts for all time. Car and bike parts live a hard life. They deal with extreme heat and rain.
Heat is the top foe. These parts pass huge power. That makes a lot of heat. If the part gets too hot, the inside melts. The tiny parts fry up.
Many bike parts sit right near the hot motor. They bake in the heat. If you swap one, see if you can move it. Move it to the cool air. It will last twice as long.
Bad loose wires also kill them. If your battery nuts are loose, the part works too hard. It tries to push power past a bad gap. This burns it out. Keep your battery tight and clean. The AA1Car notes on charge faults state this fact well.
Can You Fix It Or Swap It?
Can you fix a bad part? Most times, no.
Car alternators have internal parts. You can take the big part down. You can pull the small part out. You can solder a new one in. But it is very hard work. Most folks just buy a whole new block.
| Part Type | Can You Fix It? |
| Car Alternator | No, buy a new whole unit |
| Bike Rectifier | No, buy a new block |
| Tiny Tech Chip | Yes, solder a new chip |
Bike parts are fully sealed. They are filled with hard black glue. This makes them safe from rain. But it makes them a locked box. You can not fix them. You just toss them out and buy a new block.
Small tech chips are very cheap. They cost a few cents. Just pull the bad one off and push a new one on.
How to Pick the Best New Part
Do not buy the cheap part online. I did that once. It caught on real fire. I am not joking with you.
Buy an OEM part. OEM means the brand that built your car. It will cost more cash. But it will not burn your car to the ground.
If you must buy an off brand part, read the reviews. Look for strong parts. Some shops make heavy parts. These are great if you run big bright lights.
My Final Take
Learning how to test voltage regulator faults changed my life. It gave me real pride. I stopped handing cash to pros for simple fixes. I stopped guessing and buying parts I did not need.
Take your time. Charge your battery first. Keep your hands steady. Read your meter well. The numbers will tell you the truth. If you read this guide, you will find the fault. You can fix it yourself. You will be back on the road real soon.
Top Questions Asked
How long does a test take?
It just takes five minutes. If your battery is full, you can do the rest test, the low run test, and the high rev test fast.
Can I test it with no meter?
No. You need exact numbers. Guess work is not good. A basic test meter is a must for this job.
What if I drive with a bad part?
Your car will die on the road. If power is too high, you will wreck your battery and blow your bright lights.
Does a bad part drain power at night?
Yes. A bad inner door can let power leak back out of the battery all night. Your car will be dead the next day.
Can a car battery shock my bare hands?
No. 12 volts will not shock your skin. But you must never let a metal tool touch both posts at once. That makes a huge spark.
4 thoughts on “1 Fast Guide: How to Test Voltage Regulator Issues”