
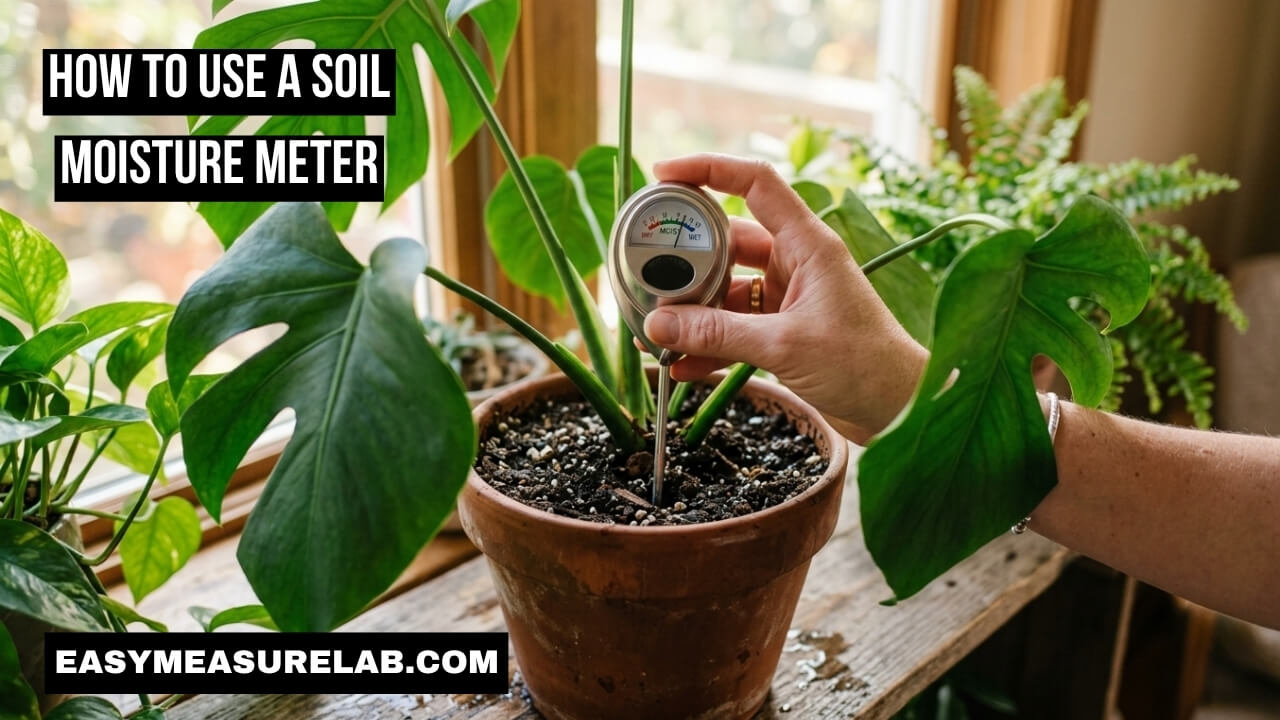
I used to kill my indoor plants. It happened all the time. I thought I was doing a great job. I watered them every single Sunday. But then my big green plant turned yellow. It died quickly. When I pulled it out of its pot, the roots were pure mush. That is when I knew I needed help. I finally took time to learn how to use a soil moisture meter. It changed my whole life.
This small tool fixes the biggest plant problem. It stops you from guessing. You just push it into the dirt. It tells you if the plant is thirsty. It also tells you if the plant is too wet. In this guide, I will share my best tips. You will learn exactly how to do this. You will see how simple plant care can be.
Why I Stopped Guessing With My Plants
For a long time, I just used my finger to check the dirt. I poked the top of the soil. If it felt dry, I poured in water. But that is a bad plan.
The top of the soil dries out fast. The air in your house hits it first. But deep down, the bottom of the pot stays wet. I kept adding water because the top looked dry. Down at the bottom, my plant roots were sitting in a wet swamp. They drowned.
A meter solves this issue fast. It has a long metal stick. You push it deep into the pot. It checks the dirt down by the roots. That is where it matters most.
| Problem | Fix |
| Top dirt feels dry | Use a meter to check deep down |
| Bottom dirt stays wet | Water only when the dial says dry |
| Roots turn to mush | Stop watering on a strict schedule |
What Is This Handy Tool?
Before we get to the main steps, let us look at the tool. It is very basic. It has a dial on top and a long metal stick on the bottom.
Most of these tools do not use batteries. I love that. They use a simple reaction. The metal touches the wet dirt. This makes a tiny spark of power. That power moves the needle on the dial.
You never have to plug it in. You never have to charge it. You just grab it from your shelf and use it.
7 Steps: How to Use a Soil Moisture Meter
Figuring out how to use a soil moisture meter is very easy. But you must do it the right way. If you skip a step, you might get a bad reading. Here is the exact daily routine I use for my green friends.
Step 1: Look at the Plant First
First, take a good look at your plant and its pot. Look at the top of the dirt.
If the dirt is rock hard, be careful. Do not jam the metal stick in fast. You might break the tip. If the dirt is super hard, the plant is very dry. You should pour a tiny bit of water on top first. This makes the dirt soft.
Step 2: Pick the Right Spot
Do not push the stick right next to the main stem. This is a big rule.
The main, thick roots live right next to the stem. If you push a metal stick through them, you will hurt the plant. Look for a spot halfway between the stem and the edge of the pot. This is the safe zone.
Step 3: Push the Probe Down Deep
Now, take the metal stick. Push it gently into the dirt.
Go down about two-thirds of the way to the bottom. The root ball lives down there. You want to know if the root ball is wet or dry. If you only go down one inch, the tool will not help you. Push it deep, but do it slowly.
Step 4: Wait and Read the Dial
As soon as the stick is in the dirt, the needle will jump.
Most dials have numbers from 1 to 10. Wait a few seconds. Let the needle stop moving. Look closely at the number. Red means dry. Green means moist. Blue means very wet. Note the number in your head.
Step 5: Test a Second Spot
Never trust just one spot.
Water does not spread evenly in a pot. Sometimes the left side is dry. Sometimes the right side is wet. Pull the tool out. Wipe it off with a cloth. Then, push it into the other side of the pot. Look at the number again.
Step 6: Decide to Water or Wait
Now you have two numbers. Use them to make a choice.
If both sides read a low number, your plant needs a drink. Go ahead and grab your watering can. If one side is wet and one is dry, wait a day or two. If both sides are wet, walk away. Do not add any water at all.
Step 7: Clean and Store the Tool
This is a step I used to skip. It was a big mistake.
When you leave wet dirt on the metal stick, the tool gets ruined. It messes up the sensor. You must wipe the stick clean after every use. I keep an old, dry cloth near my pots. I just wipe the metal clean before I put it in the drawer.
| Step | Action | Why It Matters |
| Step 2 | Pick a spot away from the stem | Protects the big, main roots |
| Step 5 | Check a second spot | Dirt dries unevenly in the pot |
| Step 7 | Wipe the stick clean | Stops rust and keeps readings true |
Reading the Dial: What Do the Numbers Mean?
Learning how to use a soil moisture meter means learning the numbers. The dial has a scale from 1 to 10. This scale tells a story about your dirt.
The Red Zone (Numbers 1 to 3)
This is the dry zone on the dial.
If your needle stays in the red, the dirt is dry. There is almost no water left. For some plants, this is a great thing. Cactus plants love the red zone. But if a leafy fern reads in the red zone, it is in big trouble. It needs a drink fast.
The Green Zone (Numbers 4 to 7)
This is the damp zone.
This is the happy place for most house plants. When the dirt is green, it has a good mix of water and air. When the needle drops to a 4, I get my watering can ready. That is the best time to give most plants a good soak.
The Blue Zone (Numbers 8 to 10)
This is the wet zone.
If your tool reads an 8 or higher, the dirt is very wet. Stop right there. Do not add water. The only time it should read this high is right after you water the plant. If it reads a 9 a whole week later, your dirt holds too much water.
| Meter Number | Zone Color | What You Should Do |
| 1 to 3 | Red | Water leafy plants. Leave cactus alone. |
| 4 to 7 | Green | Wait a few days before you add water. |
| 8 to 10 | Blue | Do not add water. Let the pot dry out. |
How to Use Moisture Meter for Plants Indoors vs Outdoors
I use my tool for my living room pots and my outside garden. But you must use it in different ways. The dirt outside is not like the dirt inside.
Learning how to use moisture meter for plants outside takes practice. You can learn it quickly.
Using It Indoors
Indoor dirt is usually soft. It is full of light stuff like peat moss.
It is very easy to push the stick into an indoor pot. The indoor air does not change much. There is no heavy rain. There is no hot sun. You just check the pots once a week. It is a very easy job.
Using It Outdoors
Outside, the dirt is often packed very tight.
It can have hard rocks. It can have thick clay. It can have huge tree roots. When you use the tool outside, push very slowly. If you hit a rock, stop moving. Pull it out and find a softer spot. If you force it hard, you will bend the stick. A bent stick is a broken stick.
| Place | Hard Part | Best Tip |
| Indoor Pots | Dirt can dry in patches | Check two sides of the same pot |
| Garden Beds | Dirt drains water fast | Push deep into the main root zone |
| Yard Dirt | Dirt has rocks and clay | Push slowly to stop the stick from bending |
Big Mistakes I Made Early On
When I first learned how to use a soil moisture meter, I made silly mistakes. I want to tell you about them. I hope you do not do the same things.
Leaving the Tool in the Dirt
This is the top way to ruin a good tool.
I used to leave my stick sitting in my biggest pot. I did it all the time. I thought it was a cool way to check the dirt every day. But the wet dirt rusted the metal. It ruined the tool fast. In one month, it broke. Always pull it out when you are done.
Ignoring the Type of Dirt
Different dirt acts in different ways.
Some of my plants live in chunky bark. The tool does not work well in chunky bark. The metal stick must touch wet dirt to read the water. In bark, the stick hits air pockets. It reads dry even when the bark is wet. You must know what kind of dirt you have.
Forgetting to Clean the Tip
I said this before, but it is so huge.
Over time, minerals from tap water build up on the metal tip. It makes a clear film. This film stops the tool from working. If your tool always says dry, it might just be dirty. I rub my stick with rough paper once a year. It keeps the metal shiny.
Matching Your Meter to Plant Types
A meter is only good if you know what your plant wants. You must match the reading to the plant type.
Not all plants want the same amount of water. Learning how to use a soil moisture meter means learning about your plants. I group my plants into three basic types.
The Dry Desert Plants
Think about a cactus or a jade plant.
These plants hate sitting in wet dirt. They store extra water in their thick leaves. I wait until my dial reads a 1 before I water them. Sometimes I even wait a whole week after it hits a 1. They love a long dry spell.
The Jungle Plants
This group has popular plants like pothos and monsteras.
These plants are tough. But they still like to dry out a bit. I wait until the tool drops to a 3 before I water them. If you keep them in the blue zone all the time, they will get sick. They need air in the dirt to breathe.
The Thirsty Leafy Plants
Ferns and peace lilies belong in this group.
These plants will look sad if they dry out. If my peace lily drops to a 4 on the dial, the leaves fall down. I try to keep these plants in the middle of the green zone. I water them as soon as the needle hits a 4.
| Plant Type | Examples | Water When Dial Reaches |
| Desert | Cactus, Jade | 1 (Very Dry) |
| Jungle | Pothos, Monstera | 3 (Almost Dry) |
| Thirsty | Fern, Peace Lily | 4 or 5 (Lightly Damp) |
How Different Soil Types Change Your Reading
Dirt is not just dirt. There are many kinds of dirt.
When you learn how to use a soil moisture meter, you must look at the dirt mix. The tool works best in standard potting soil. This soil is dense. It hugs the metal stick.
Heavy Clay Soil
If you use the tool outside in thick clay, it might read high.
Clay holds water for a long, long time. The dial might show an 8 for two weeks. This means the soil is too heavy for most plants. You might need to dig in some sand to help the water flow away. For more on soil types and drainage, the RHS guide to soil types is very helpful.
Chunky Mixes
If you grow orchids, you use a chunky mix. It is full of large bark pieces.
The tool fails in bark. The stick slides between the wood chips. It touches the air, not the wet wood. It will read a 1, even if the pot is soaking wet. Do not use this tool for orchids. Lift the pot instead. If it feels heavy, it has water.
What to Do When the Meter Reads Wet
Sometimes you water a plant, and it stays on a 9 for weeks. This is scary.
This usually means your dirt is too heavy. It holds too much water. Or, maybe your pot does not have holes in the bottom. A pot without holes is a trap for water. The water goes in and never leaves.
If the dial stays at a 9 for a week, you must fix it. You need to pull the plant out. Put it in a new pot with holes. Add some white perlite rocks to the dirt. This helps the water drain out fast. If you leave it wet, the roots will rot. You can read more about stopping root rot at the Penn State Extension site.
What to Do When the Meter Reads Dry
This happened to me last month. I poured water in a pot, but the tool still read a 1.
If this happens, your dirt might repel water. The dirt gets so dry it turns into a hard brick. When you pour water on top, it does not soak in. It runs down the inside walls of the pot. It flows right out the bottom holes.
The plant gets nothing. The tool reads dry because the center is still a dry brick. To fix this, fill a big bowl with water. Set the whole pot in the bowl. Let it sit for an hour. The dirt will drink the water up from the bottom holes.
| The Issue | Why It Happens | The Fix |
| Reads 9 for weeks | No holes in the pot | Repot with fresh dirt and holes |
| Reads 1 after watering | Dirt repels the water | Soak the whole pot in a bowl |
| Needle jumps wildly | Stick touches metal pot | Move stick to center of the dirt |
Caring for Your New Tool
Your tool takes care of your plants. You must take care of your tool.
It does not ask for much. You do not need to buy batteries. You do not need to oil it. But you do need to keep it clean.
I keep a soft rag in my plant box. Every time I pull the stick from the dirt, I wipe it. I rub it from top to bottom. I make sure no brown dirt is left on the silver stick. If it gets dull over a year, I use a tiny bit of steel wool. I rub it softly. It shines right up.
Does the Time of Year Matter?
Yes, the time of year changes everything.
In the summer, it is hot. The sun shines a long time. Plants grow fast. They drink a lot of water. You might need to use your tool twice a week. The pots dry out fast.
In the winter, it gets cold. The days are short. Plants go to sleep. They stop growing. They do not drink much at all. In the winter, I only check my plants once every two weeks. If you water a plant in winter like you do in summer, it will rot. Always trust the tool, not the calendar.
Troubleshooting Weird Readings
Sometimes the tool acts a little crazy. I have panicked a few times. I thought the reading was a lie. Here is what to do when things do not make sense.
The Needle Bounces Around
If the needle jumps back and forth fast, look at your pot.
Are you using a metal pot? If the metal stick touches the metal pot, it gets confused. It ruins the tiny electrical signal. Pull the stick out. Move it straight to the middle of the dirt. Try it again. It should stop bouncing.
The Needle Stays Dead
If you push the stick into wet mud and the needle stays at 1, the tool is broken.
This happens if the tool is very old. It also happens if you dropped it hard on the floor. If cleaning the tip does not fix it, you have to throw it away. Buy a new one. They are very cheap. It is worth it to save your expensive plants.
Knowing When to Trust Your Tool
When you first start using this tool, it feels like an extra chore.
You have to walk around the house. You have to poke every single plant. It takes ten minutes. But after a few weeks, it gets super fun. You start to learn the rhythm of your home. You will see that the fern needs a drink twice a week. You will see the cactus only needs a drink once a month.
I do my watering rounds every Sunday morning. I grab my watering can. I grab my dry cloth. I grab my tool. I check the dirt. If a plant does not need water, I skip it. I do not feel bad about skipping it anymore. I know I am doing the right thing.
This small habit changed how I garden. I no longer kill my favorite leafy friends. My house is full of big, green leaves. I trust the numbers on the dial. The experts at The Spruce also say good watering habits are the secret to big plants. You just have to listen to what the dirt tells you.
Final Thoughts
Learning how to use a soil moisture meter is the best step you can take. It changes you from a plant killer into a plant expert. It takes away all the deep stress of guessing. You stop wondering if you are doing too much or too little.
Just remember the simple rules. Push it down deep to the root zone. Check two different spots in the pot. Wipe the metal stick clean when you finish. If you listen to what the numbers say, your plants will grow huge. It is a very tiny step that saves a lot of plant lives.
Frequently Asked Questions (FAQs)
What is the best way to use a moisture meter for plants?
The best way is to push the metal probe two-thirds of the way down into the soil. Check a spot halfway between the stem and the edge of the pot. Wait for the needle to stop, read the number, and wipe the probe clean when done.
Can I leave my moisture meter in the soil all the time?
No, you must never leave it in the dirt. The wet dirt will cause the metal probe to rust rapidly. This destroys the sensor. Always pull it out and wipe it dry with a cloth after every single use.
Why does my meter read dry right after I add water?
This happens when your dirt is very dry and repels water. The water runs down the inside of the pot without soaking the middle. It also happens if you use a chunky bark mix, because the probe hits air pockets instead of wet soil.
Do soil moisture meters need to have batteries?
No, basic analog meters do not need batteries at all. They make their own tiny electrical charge using the moisture in the dirt. Only fancy digital versions with light-up screens require batteries to work.
How do I clean my soil moisture meter tip properly?
Keep it very simple. Wipe the metal stick with a soft, dry cloth after every use. If the metal gets cloudy over a year, rub it gently with a piece of fine steel wool or light sandpaper to remove mineral buildup.
1 thought on “How to Use a Soil Moisture Meter: 7 Top Plant Secrets”