
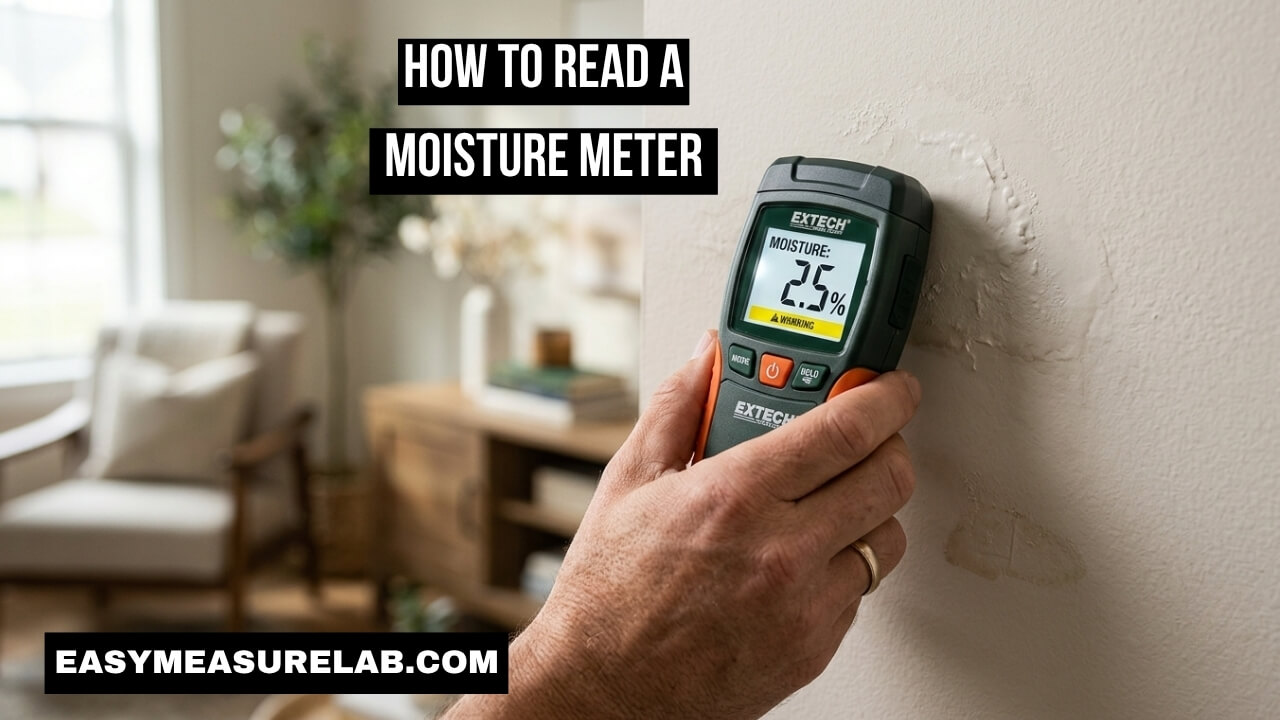
I bought my first moisture meter after a huge storm. My basement flooded. I dried the floors. But the walls still felt weird. I bought a tool to check for hidden water. At first, I had no clue how to read a moisture meter. I just saw random numbers on a small screen.
I made a lot of mistakes back then. I thought dry wood should read zero percent. That is totally false. Over time, I learned what the numbers actually mean. I figured out how to read moisture meter readings correctly. Now, I use my meter all the time. I check firewood. I check bathroom walls after a shower. In this guide, I will share the 7 specific tips I use. You will learn to spot hidden water before nasty mold grows.
The Basics of How to Read a Moisture Meter
You must start with the right setup. If you hold the tool wrong, the numbers lie. Here are the first two tips I learned.
You need to know your tool. Different tools work in different ways. Setting up the tool takes just five seconds, but it saves hours of stress.
Tip 1: Choose the Right Meter Type and Mode
You have two main choices. Pin meters have sharp metal tips. Pinless meters have a flat pad on the back. Both find water. They just work in different ways. Pin tools measure electrical flow. Wet wood conducts electricity very well. Pinless tools use radio waves. They scan beneath the surface.
Most new tools have different modes. You must press the mode button. Choose “Wood” for lumber. Choose “Bldg” or “Drywall” for walls. If you test a wall on the wood mode, the math is completely wrong. Check your manual. Set the tool right before you touch the wall.
| Meter Type | Best Used For | Main Drawback |
| Pin Meter | Firewood, rough lumber | Leaves small holes |
| Pinless Meter | Drywall, nice floors | Needs a perfectly flat surface |
Tip 2: Position the Tool Properly on the Surface
How you hold the tool changes the reading. If you use pins, push them in firmly. Push them in the same direction as the wood grain. Do not push across the grain. The electrical current flows better along the grain.
If you use a pinless tool, press the flat pad tight against the wall. The whole pad must touch the wall. If the wall is bumpy, the tool gets confused. Also, keep your hands away from the sensor. Your hand holds water. If your hand is too close, the tool reads you instead of the wall.
Understanding the Numbers on the Screen
Looking at the screen can be confusing at first. There are numbers, lights, and small icons.
You need to know what to ignore and what to trust. The main number is always your best guide.
Tip 3: Learn How to Read a Digital Moisture Meter
Old tools used moving needles. Today, we use digital screens. Knowing how to read a digital moisture meter is quite simple. Look at the big number in the middle. It gives you a percentage. Write that number down.
Many screens also have colored lights. Green means the spot is dry. Yellow means it is a little damp. Red means the spot is very wet. You might also see a small water drop icon. If two drops appear, the spot is soaked. Trust the percentage number over the colors. Colors are just quick guides.
| Display Feature | What It Tells You | How I Use It |
| Main Number (%) | Exact water level | I write this down to track changes |
| Green Light | Safe zone | I move on to the next spot |
| Red Light | Danger zone | I start looking for a leak |
Tip 4: Test Multiple Spots to Find the True Source
Never test just one single spot. One spot does not tell the whole story. You need a big picture. I learned this when checking my ceiling. I found one wet spot. I thought the leak was right there. I was wrong.
The real leak was three feet away. Water travels along pipes and wood beams. To find the source, start at the wet spot. Move the tool two inches away. Test again. Keep moving in a circle. Follow the numbers. The numbers will go up as you get closer to the real leak. The highest number is your source.
Material Types and Safe Moisture Levels
A number means nothing if you do not know the material. Wood and drywall act very differently.
You have to know what is normal for your house. Every building material holds water in its own way.
Tip 5: Know Your Material’s Safe Moisture Range
This is the most important lesson. Wood is never completely dry. Inside a warm home, wood floors should read between 6% and 8%. If you check firewood, it should read 15% to 20%. If firewood is wetter than that, it burns poorly and makes thick smoke.
Drywall is totally different. Drywall should have almost no water. A healthy wall reads under 1%. Some meters just use a 0 to 100 scale for drywall. This is a relative scale. To use it, find a dry wall first. Test it to get a baseline number. Then test the bad wall. If the bad wall is much higher, you have water trapped inside. Following basic EPA guidelines on mold shows why keeping these numbers low is vital for indoor air.
| Material | Safe Moisture Range | What To Do If High |
| Indoor Wood Floors | 6% to 8% | Run a dehumidifier |
| Firewood Logs | 15% to 20% | Let the wood dry longer outside |
| Drywall | Less than 1% | Cut the wall open to find the pipe |
Avoiding Common Measurement Mistakes
I ruined many readings by rushing. I panicked over fake numbers. I want to save you the headache.
Follow these next two tips to avoid false alarms. They are very common mistakes.
Tip 6: Wipe Away Surface Moisture First
Sometimes a basement wall is just sweaty. Humid air hits cold concrete. Water drops form on the wall. The inside of the wall might be bone dry. If you stick a meter on that sweat, the meter screams. It says the wall is flooded.
This is a false read. Always wipe the wall with a dry towel first. Wait one full minute. Then apply the tool. Now you are reading the actual wall, not the humid room air. This simple trick saves so much stress. The CDC explains that controlling indoor humidity stops this kind of wall sweat.
Tip 7: Watch Out for Hidden Metal Fasteners
Pinless meters use radio waves. Metal objects bounce these waves back fast. The tool thinks metal is water. It will give a huge reading. I once scanned a wall and got a 100% wet reading. I panicked. I almost broke the drywall open with a hammer.
Luckily, I moved the tool two inches to the left. The reading dropped to zero. I had just scanned right over a metal screw in the wood stud. If you get a random spike, move the tool slightly. If the number falls instantly, you found hidden metal, not a water leak.
| Mistake | Why It Fails | Better Approach |
| Testing wall sweat | Tool reads room humidity | Wipe the wall dry first |
| Scanning over nails | Metal acts like water | Move tool two inches away |
| Low battery power | Tool gives weak signals | Always use fresh batteries |
More Practical Advice on How to Read Moisture Meter Readings
Your environment plays a big role in your readings. Temperature and paint can change the numbers.
You must adjust for these outside forces. If you ignore them, your tool will lie to you.
Dealing with Temperature Swings
Hot wood reads wetter than cold wood. Heat makes water move faster. The electrical current travels quicker. If you leave your meter in a freezing truck, the numbers will be too low.
Always let your wood and your tool reach room temperature. Wait a few hours. If you bring cold firewood inside, wait before testing it. Many expensive meters have a temperature fix built right in. Check your guide to see if yours does this automatically. The USDA Forest Service shares extensive data on how wood reacts to cold and heat.
How Surface Finishes Change Results
Paint, wax, and thick stain can block a pinless meter. The sensor pad cannot read past the thick wax. It gives a weak or false number.
If a floor has thick wax, use a pin meter instead. Push the sharp pins deep through the wax. You need to touch the raw wood underneath. This is the only way to get true data on heavily finished floors.
Keeping Your Tool Accurate and Safe
A dirty tool will lie to you. You have to take care of the sensor and the pins.
These devices are fragile. Treat them like a good camera. Keep them safe and dry.
Cleaning and Storing Your Device
Tree sap sticks to metal pins. Sap acts like glue. It blocks the electrical charge. Wipe the pins clean with a dry rag after every use. Never wash a moisture meter with water. That will break it.
If the pins bend or break, buy new ones. They unscrew easily. Keep your tool in its hard case. Do not leave it in a damp shed. Rust will ruin the internal parts. Proper tool care aligns with advice from Energy.gov on maintaining home inspection equipment for better efficiency.
| Tool Part | Maintenance Step | Why It Matters |
| Metal Pins | Wipe off sap and dirt | Dirt blocks the electrical charge |
| Sensor Pad | Keep flat and scratch-free | Scratches cause fake readings |
| Battery Box | Take batteries out in summer | Stops acid leaks |
Final Thoughts
Learning how to read a moisture meter takes a little practice. It is not hard. You just need to know what material you are touching. You must know what number is normal for that material. A good meter takes the guessing out of home repairs.
Do not panic at every high number. Check for hidden metal. Check the room humidity. Test a dry wall first to get a safe baseline. Once you trust your tool, you will feel much safer in your home. You will find leaks before they ruin your walls. It is the best tool you can buy for peace of mind.
Frequently Asked Questions (FAQs)
What is a normal moisture meter reading for walls?
A normal drywall reading is usually under 1%. Drywall should be completely dry. If the reading is higher than 1%, you might have a small leak nearby.
Can a moisture meter detect mold?
No, a moisture meter does not see mold. It only finds water. However, mold needs water to grow. If you find high moisture, mold will likely grow there soon.
How do I know if my moisture meter is accurate?
Use a calibration test block if your meter came with one. You can also test a piece of wood you know is perfectly dry. If the tool shows a high number on dry wood, it is broken.
What does the red light mean on a digital meter?
The red light means the material is very wet. It usually means you have an active leak. You need to take action right away to stop the water and dry the area.
Why does my meter beep when I touch the wall?
Many digital meters beep to warn you of high water levels. It is an alarm. It can also beep if it detects hidden metal like a nail or a pipe. Move it an inch to check.
1 thought on “7 Easy Tips: How to Read a Moisture Meter Correctly”